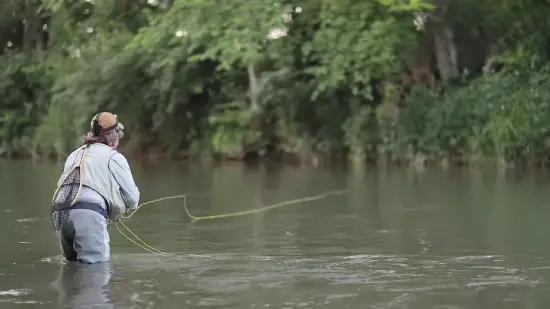
How to Make Your Own Fishing Waders: 10 Steps [DIY]
When you cast your fishing line into the water, the mist gently caresses your face as you stand knee-deep in a serene river. A pair of fishing waders you made with your own two hands adds to the tranquility of the moment. But do you know how to make your own fishing waders?
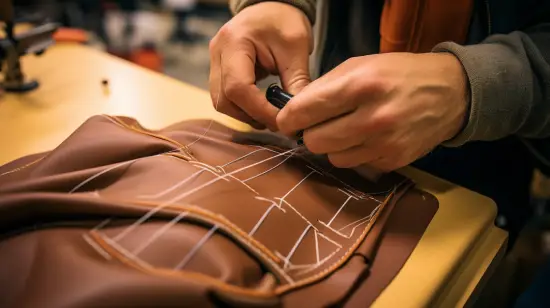
Start by choosing the right materials, such as durable waterproof fabric and strong thread. Next, measure yourself carefully to ensure a proper fit, considering the thickness of the fabric and any additional layers you plan to wear underneath.
Then, cut out the patterns according to your measurements and sew the seams together, reinforcing them for added strength. And add reinforcement patches to areas likely to experience wear and tear, such as the knees and seat.
Here, we will guide you through creating your very own fishing waders. Also included are types of fishing waders and their popularity.
Steps on How to Make Your Own Fishing Waders
To make your own fishing waders, there are several important steps you need to follow. Each step is important to ensure the waders fit correctly and last through many fishing trips.
- Step 01: Choosing the Right Materials
- Step 02: Measuring for Proper Fit
- Step 03: Cutting Out the Patterns
- Step 04: Sewing the Seams
- Step 05: Adding Reinforcement Patches
- Step 06: Attaching Suspenders or Straps
- Step 07: Creating Watertight Closures
- Step 08: Testing for Leaks
- Step 09: Adding Insulation if Desired
- Step 10: Customizing for Personal Style
Step 01: Choosing the Right Materials
When making your own fishing waders, start by selecting the perfect materials for the job. The main body of the waders should be made from a durable and waterproof fabric such as Gore-Tex or nylon. These materials will ensure that you stay dry and comfortable while out on the water.
If you plan to fish in colder weather, consider adding insulation to the waders to keep you warm.
For the soles of the boots or stocking feet, it’s important to choose a sturdy and slip-resistant material. This will provide you with the necessary traction and stability while walking on various terrains.
Step 02: Measuring for Proper Fit
In addition to making fishing waders, ensuring a proper fit is equally crucial for optimal comfort and mobility. To begin, gather a tape measure and accurately measure your chest, waist, hips, inseam, and shoe size.
Start with your chest and wrap the tape measure around the widest part, just under your armpits. Next, measure your waist by placing the tape measure around your natural waistline.
For the hips, measure the widest part of your hips and buttocks. To determine your inseam, measure from the crotch to the desired length of your waders.
Lastly, measure your shoe size by placing your foot on a flat surface and using the tape measure to measure the length from the heel to the longest toe.
Step 03: Cutting Out the Patterns
Now that you’ve gathered the necessary measurements, it’s time to unleash your creativity and cut out the patterns for your perfectly tailored waders. This will allow you to dive into the water with confidence and style.
Start by using the measurements you took for the chest, legs, and boots or stocking feet to create patterns on your chosen fabric. Make sure to leave allowances for seam allowances and closures, as these are essential for a proper fit.
Take your time and be precise when cutting out the patterns. Ensure that each piece is accurately shaped and matches your measurements. It’s important to follow the patterns closely to achieve the desired fit and functionality.
Remember, the success of your waders lies in the accuracy and attention to detail during this cutting process.
Step 04: Sewing the Seams
Stitching the pieces together with a heavy-duty sewing machine is the key to creating durable, leak-proof waders that’ll stand up to any fishing adventure. Begin by aligning the edges of the fabric pieces and pinning them together to ensure a precise fit.
Use a heavy-duty needle and thread that’s designed to withstand the stress of outdoor activities. Start sewing at one end, using a straight stitch and backstitch at the beginning and end of each seam to reinforce it. As you sew, make sure to maintain a consistent seam allowance to ensure evenness and durability.
For high-stress areas, such as the crotch and knees, reinforce the seams with additional stitching or zigzag stitches. After stitching all the seams, seal them using waterproof tape or sealant to prevent any leaks. This extra step will ensure that your waders are completely waterproof and ready for your next fishing trip.
Step 05: Adding Reinforcement Patches
To ensure the longevity of your waders, why not reinforce high-wear areas with durable patches that can withstand any adventure? Adding reinforcement patches is a simple yet effective way to protect your waders from wear and tear. Here are five steps to guide you through the process:
- Cut patches of the same fabric or a sturdier material.
- Choose areas with the most stress, such as the knees and seat.
- Sew the patches securely onto these areas using a strong and durable thread. Make sure to overlap the patches with the surrounding fabric to ensure maximum coverage.
- Use a zigzag stitch or a strong adhesive to attach the patches for added strength.
Step 06: Attaching Suspenders or Straps
When choosing a suspender or strap system, opt for adjustable buckles or elastic that can be easily customized to your body shape and preferences. Wader suspenders or straps should be sewn securely using a strong thread or fishing line to ensure durability.
Make sure the attachment points are reinforced with extra stitches or patches to prevent any tearing or ripping. To help you visualize the process, refer to the table below, which outlines the steps for attaching suspenders or straps to your waders:
| Step | Instructions |
| 1 | Lay out your waders and suspenders or straps. |
| 2 | Position the suspenders or straps on the front and back of the waders, ensuring they align with your shoulders. |
| 3 | Use a needle and thread to sew the suspenders or straps onto the waders, starting from one end and working your way to the other. |
| 4 | Make multiple passes with the needle to ensure a secure attachment, reinforcing any stress points. |
| 5 | Test the fit of the suspenders or straps, adjusting the buckles or elastic as needed for a snug yet comfortable fit. |
Step 07: Creating Watertight Closures
The creation of watertight closures is an important step in keeping your waders dry and comfortable. Add zippers or drawstrings to the ankles and waistbands to create watertight closures. These closures will allow you to adjust the fit of your waders, ensuring a snug and secure fit.
Here are some additional tips to help you create effective watertight closures:
- Use high-quality zippers or drawstrings that are resistant to water and corrosion.
- Make sure to seal any stitching or seams with a waterproof sealant.
- Test your closures before heading out on your fishing trip to ensure they’re fully waterproof.
- Consider adding Velcro straps or buckles for added security.
Step 08: Testing for Leaks
After creating watertight closures, it’s time to test for leaks in your waders, ensuring they’ll keep you dry on your fishing adventures. Can you imagine the disappointment of stepping into the water and realizing your waders are leaking? To avoid such a scenario, follow these steps to test for leaks.
- Fill a bathtub with water and put on your waders.
- Slowly step into the tub, paying close attention to any areas where water might seep through.
- Move around, making sure water reaches all parts of the waders.
- While in the water, check for any leaks by feeling for dampness or cold spots.
- Mark any leaks you find with a waterproof pen.
- Once you’re done, patch the leaks using a suitable sealant or tape.
Through this testing process will ensure your waders are fully waterproof and ready for your fishing excursions.
Step 09: Adding Insulation if Desired
To maximize your comfort in colder weather, consider enhancing the warmth of your gear by adding a layer of cozy fleece or insulated fabric to the chest and legs of your waders. Not only will this provide insulation, but it’ll also help retain body heat, keeping you warm throughout your fishing expedition.
Here’s how you can add insulation to your fishing waders:
- Choose the right material: Opt for fleece or insulated fabric that’s lightweight yet effective in trapping heat.
- Measure and cut: Take precise measurements of your chest and legs, and cut the fabric accordingly to ensure a proper fit.
- Attach the insulation: Use a strong adhesive or sewing machine to attach the fabric to the inside of your waders securely.
- Movement test: Ensure the added insulation doesn’t restrict your movement or add unnecessary bulk.
Step 10: Customizing for Personal Style
If you want to add a personal touch to your fishing gear, why not customize your waders with pockets, D-rings, or other accessories? Adding these features can not only enhance the functionality of your waders but also reflect your personal style. Here are some ideas for customizing your fishing waders:
| Accessory | Description | Usage |
| Pockets | Convenient storage for small fishing essentials | Keep tools, bait, or personal items within reach |
| D-rings | Attach additional gear or accessories | Hang a net, attach a tool, or secure a water bottle |
| Decals | Personalize your waders with unique designs | Show off your favorite fishing brand or artwork |
| Embroidery | Add your own design or logo for a custom look | Display your name, initials, or a favorite image |
| Insulation | Add insulation for added warmth in cold weather | Extend your fishing season into colder months |
Types of Fishing Waders

When it comes to fishing waders, there are several types to choose from. Here are some of the most popular:
- No 01: Bootfoot Waders
- No 02: Stockingfoot Waders
- No 03: Hip Waders
- No 04: Chest Waders
- No 05: Thigh Waders
- No 06: Convertible Waders
No 01: Bootfoot Waders
For a more convenient and hassle-free fishing experience, consider bootfoot waders. These waders come with integrated boots attached to them, making them easy to put on and ensuring that you never forget your boots at home again.
Imagine being able to effortlessly transition from walking on land to wading in the water without worrying about changing footwear. The integrated boots on bootfoot waders provide excellent traction, giving you stability and grip on slippery surfaces.
With bootfoot waders, you don’t have to spend time and effort trying to match the right pair of boots with your waders. They’re already perfectly paired together. Bootfoot waders are known for their durability and longevity, making them a wise investment for any avid angler.
No 02: Stockingfoot Waders
Get ready to elevate your fishing experience with stockingfoot waders. The ultimate choice for anglers seeking customizable options and superior comfort.
These waders offer a versatile and practical solution for those who want to have control over their footwear choices. With stockingfoot waders, you can choose the boots that best suit your needs, allowing you to tailor your fishing gear to the specific conditions you’ll be facing.
Whether you prefer lightweight boots for easy maneuverability or heavy-duty boots for added protection, stockingfoot waders give you the flexibility to make the right choice.
Additionally, the stockingfoot design provides a snug and secure fit, preventing any water from seeping into your boots.
No 03: Hip Waders
Step into the water with hip waders, providing you with the freedom to move easily and the confidence to explore deeper waters, making you feel invincible. These waders are perfect for fishing in shallow water, giving you more mobility compared to chest waders.
Here are five key reasons why hip waders are a great choice for any angler:
- Lightweight and comfortable: Hip waders are designed to be lightweight, allowing for easy movement and ensuring you stay comfortable during long fishing trips.
- Versatile: Whether you’re fly fishing or casting your line from the bank, hip waders are versatile enough to handle various fishing situations.
- Easy to put on and take off: Hip waders feature a simple design that allows you to put them on and take them off quickly, saving you time and hassle.
- Excellent water resistance: These waders are made from durable materials that provide excellent water resistance, keeping you dry while you wade through the water.
- Compact and portable: Hip waders are compact and easy to transport, making them a convenient option for anglers on the go.
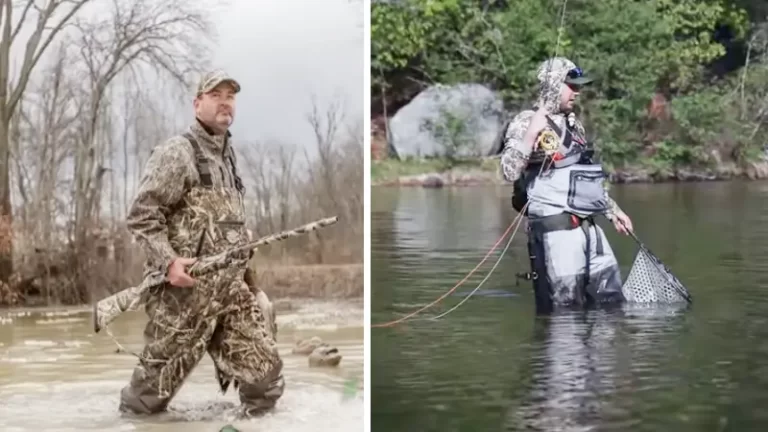
No 04: Chest Waders
When you’re wading through streams or rivers or fishing in deep water, chest waders provide the ultimate protection. With their versatile design, chest waders allow you to venture into deeper waters and stay dry from chest to toe.
They’re made with durable materials, offering excellent defense against water. Fishers who take their fishing seriously will love them. Whether you plan to fish in a fast-flowing river or explore a secluded fishing spot, chest waders will keep you comfortable and protected throughout your fishing journey.
No 05: Thigh Waders
When exploring shallow, muddy fishing spots, thigh waders ensure you can navigate with ease, keeping you dry and comfortable throughout your adventure. Thigh waders, as the name suggests, cover your legs up to your thighs, providing protection against water that’s below waist level.
They are specifically designed for situations where you need to wade through muddy areas or when the water level is low. Thigh waders are made of materials that are resistant to punctures and tears, ensuring they can withstand the rugged conditions of fishing.
Also, they’re designed to be user-friendly, allowing you to wade, walk, and cast without any restriction. You can confidently explore those hard-to-reach fishing spots with thigh waders, knowing that you’re well-equipped to handle whatever the environment may bring.
No 06: Convertible Waders
Versatile and adaptable, convertible waders offer the freedom to easily adjust their length, allowing you to seamlessly transition from waist-high to hip-high coverage while navigating diverse fishing environments.
These waders are designed with practicality in mind, providing you with the flexibility to tailor your gear to different fishing situations.
To give you a clearer picture, here’s a table that highlights the key features and benefits of convertible waders:
| Features | Benefits |
| Adjustable length | Provides versatility for different fishing conditions |
| Easy transition | Allows you to quickly switch between waist-high and hip-high coverage |
| Secure fit | Ensures a snug and comfortable fit |
| Durable materials | Withstands wear and tear in rugged fishing environments |
| Breathable and waterproof | Keeps you dry and comfortable throughout your fishing trip |
With convertible waders, you can confidently tackle any fishing scenario, knowing that you have the ability to adjust your gear to suit your needs. Whether you’re wading through shallow streams or deeper waters, these waders will adapt to provide the coverage and protection you require.
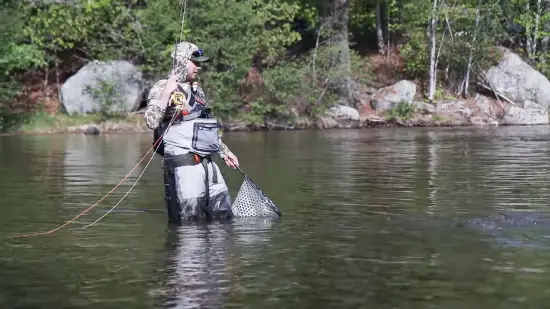
Why do fishermen wear waders?
Fishermen wear waders because they can withstand the cold water and prevent hypothermia, allowing them to fish for longer periods of time. Waders are essential for fishing in cold water as they provide insulation and keep you dry.
By wearing waders, you create a barrier between your body and the cold water, which helps to maintain your body temperature. This is especially important when fishing in colder climates or during the winter season.
Waders also protect you from the elements, such as wind and rain, ensuring that you stay comfortable and focused on your fishing. With waders, you can confidently stand in the water for extended periods without worrying about the risk of hypothermia, allowing you to enjoy your fishing experience fully.
What material are fishing waders made of?
You should know the options available to you so you can choose the best material for your fishing waders. There are three main materials used: neoprene, rubber, and breathable nylon or polyester with a waterproof membrane.
- Neoprene waders are excellent for colder conditions as they provide insulation and warmth.
- Rubber waders are durable and resistant to punctures, making them ideal for rugged terrains.
- Breathable nylon or polyester waders with a waterproof membrane offer enhanced comfort and flexibility, allowing moisture to escape while keeping you dry.
Are fishing waders worth it?
If you fish less than 10 days a year, entry-level waders would be a great buy for you. They’ll provide adequate protection and functionality without breaking the bank.
However, if you find yourself fishing 20 days a year or more, it’s definitely worth considering upgrading to midrange or high-end waders. These waders are designed with higher-quality materials and construction, ensuring better durability and longevity.
While they may come with a higher price tag, they offer superior comfort, breathability, and features that can greatly enhance your fishing experience.
You can also make your own fishing waders which can be more cost-effective and offer more freedom in terms of design, but it’s best to leave this job to the experts.
Craft Your Own Fishing Waders for Unforgettable Fishing Trips
Making your own fishing waders is now easier than ever. Note that several types of fishing waders exist, each with their own unique benefits and drawbacks. Chest waders, hip waders, and waist-high waders are some of the most popular styles, but stockingfoot and bootfoot waders also have their place in the market.
Furthermore, different materials suit different environments, with breathable options working best for warm weather and neoprene providing greater insulation in colder waters.
No matter your needs, creating your own fishing waders can be a rewarding and fulfilling experience for any angler. So grab your sewing kit, choose your ideal materials, and get to work on crafting the perfect pair for your next fishing adventure. May you make a catch of a lifetime in your handmade waders.