How to Find a Leak in Waders: Fishing Safety Tips
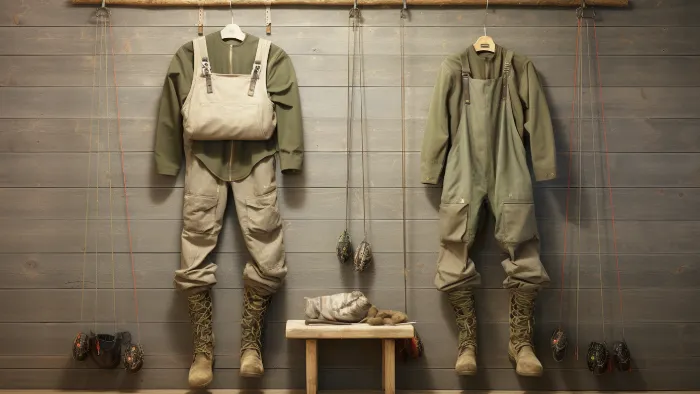
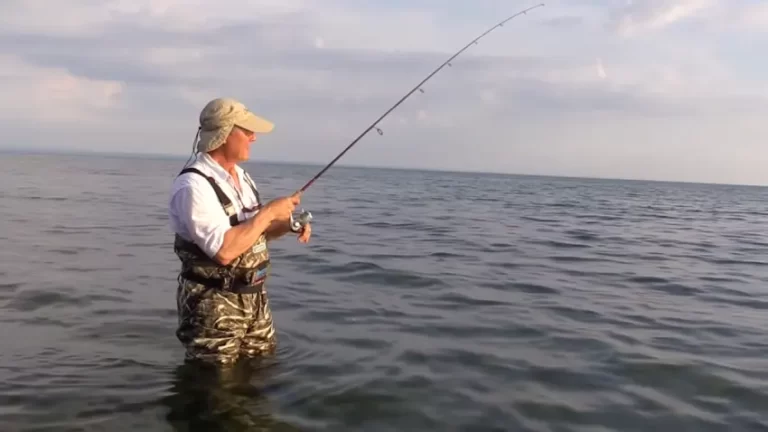
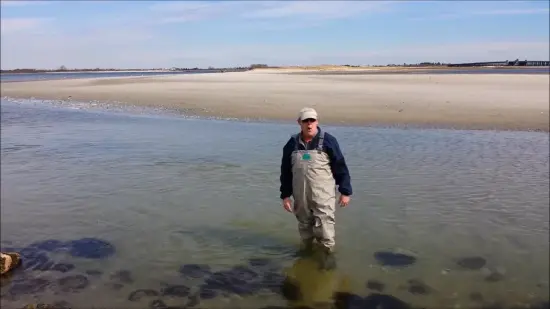
Fishing waders are essential gear for anglers, providing protection and comfort while wading in rivers, streams, or lakes. Over time, these waders can develop leaks, compromising their effectiveness and leaving you wet and uncomfortable.
But how do you find a leak in your waders?
To begin with, visually inspect the waders for any visible holes or tears. Next, you can use the water immersion method by filling the waders with water and looking for any leaks.
Another option is the soap bubble test, where you apply soapy water to the waders and look for bubbles indicating a leak. Alternatively, you can try the rubbing alcohol test or explore pressure testing options to pinpoint the exact location of the leak.
Now what if you do find a leak? No worries. We will explore effective repair options, including specialized adhesives and patches. Also, we will provide valuable tips on preventing leaks in the first place so that you can extend the life of your waders.
Ways on How Do You Find a Leak in Fishing Waders
If you’re wondering how to find a leak in your fishing waders, there are several techniques you can try. Here are some of the most common methods:
- Visual Inspection Techniques
- Water Immersion Method
- Soap Bubble Test
- Rubbing Alcohol Test
- Listening for Air Hissing
- Light and Shadow Examination
- Flexing and Bending Analysis
- Talcum Powder Method
No 01: Visual Inspection Techniques
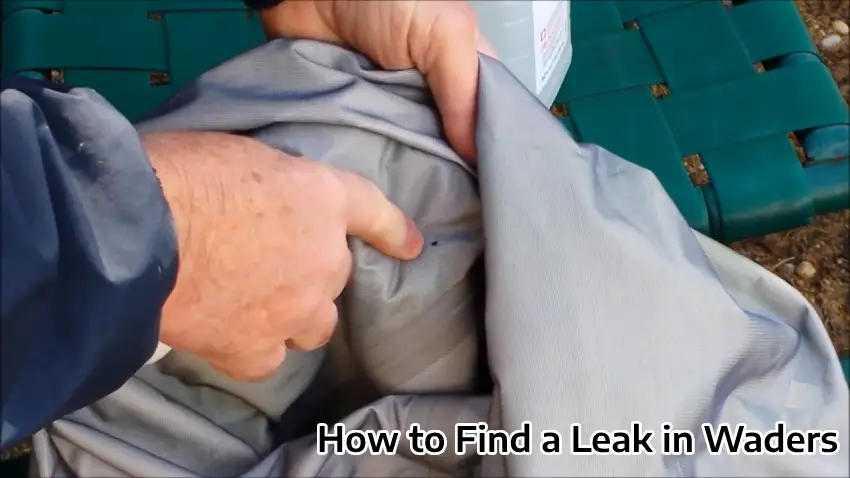
Look closely at your fishing waders to spot any visible damage, like tears or worn-out areas, and pay attention to seams, boots, and high-stress areas. To conduct a thorough visual inspection, follow these steps:
- Check for any punctures or holes that sharp objects may have caused.
- Inspect the seams for signs of separation or fraying.
- Examine the boots for any cracks or excessive wear.
- Pay close attention to high-stress areas, such as the knees and seat, for any signs of abrasion or thinning material.
No 02: Water Immersion Method
Immerse yourself in water and carefully observe for any bubbles or air streams to detect any possible leaks in your gear.
Start by submerging yourself in a bathtub or water-filled container and move slowly. Pay close attention to your boots, seams, and fabric. Look for any signs of bubbles or air escaping, as this could indicate a leak.
No 03: Soap Bubble Test
Observe closely as you mix dish soap with water in a spray bottle, allowing the soapy water to reveal hidden leaks in your fishing waders.
This simple and practical method, the soap bubble test, is reliable for detecting leaks. Spray the soapy water on suspected leak areas and closely watch for the formation of soap bubbles at the point of leakage. This will help you identify and fix any leaks in your waders, ensuring a dry and comfortable fishing experience.
No 04: Rubbing Alcohol Test
To easily identify leaks in your gear, you only need a simple mixture of rubbing alcohol and water. Spray this mixture on the suspected leak areas and observe closely.
The rubbing alcohol evaporates quickly, but it leaves behind visible marks at the leaks, making them easy to spot. Here are five reasons why the rubbing alcohol test is a practical and effective method for finding leaks in your fishing waders:
- It’s a quick and easy test to perform.
- The visible marks make it easy to pinpoint the exact location of the leaks.
- Rubbing alcohol mixtures are readily available and inexpensive.
- It can be used on various waders, including neoprene and breathable materials.
- This test can be repeated multiple times to identify and fix all leaks.
No 05: Listening for Air Hissing
As you stand in silence, allow the faint sound of air hissing to guide you toward uncovering hidden secrets. It’s important to listen carefully for this distinct sound to locate a leak in your fishing waders. Wear the waders quietly and move your hands along suspected leak areas.
No 06: Light and Shadow Examination
Immerse yourself in the moment and let the bright light reveal any hidden secrets within your waders, igniting a sense of anticipation and discovery.
Examine the waders under bright light or sunlight, looking for areas where light penetrates through, indicating potential leaks. Check for shadows forming on the inner side of the waders to identify any hidden leaks.
This method allows for a thorough examination of your waders, ensuring a practical approach to finding leaks. Remember to take your time and examine every inch of your waders for a comprehensive inspection.
No 07: Flexing and Bending Analysis
Get ready to feel the exhilaration as you put on the waders and feel the fabric flex and bend, revealing any hidden surprises lurking within. Flex and bend your legs, knees, and body in different directions, simulating fishing movements.
This dynamic stress is crucial as it can uncover leaks that may not be apparent during static inspections. By actively engaging with the waders, you can thoroughly analyze and identify potential leaks.
No 08: Talcum Powder Method
Experience the thrill as you slip into the waders and witness the fine powder delicately embracing the air, unveiling any hidden secrets that may be concealed within. The talcum powder method is a practical and effective way to locate leaks in your fishing waders.
By dusting suspected leak areas with talcum powder or a similar fine powder, any moisture or air escaping from the leak will adhere to the powder, making it visible and easier to locate.
How Do You Repair Leaks in Your Fishing Waders?
To repair leaks in your fishing waders, start by identifying the leaks. In our previous discussion, we discussed 8 ways to do this. You can choose any of them. Once you’ve identified the leaks, then follow the process below:
- Step 01: Clean and Dry the Waders
- Step 02: Patch Small Holes
- Step 03: Seam Repairs
- Step 04: Neoprene Cement for Larger Repairs
- Step 05: Test the Repairs
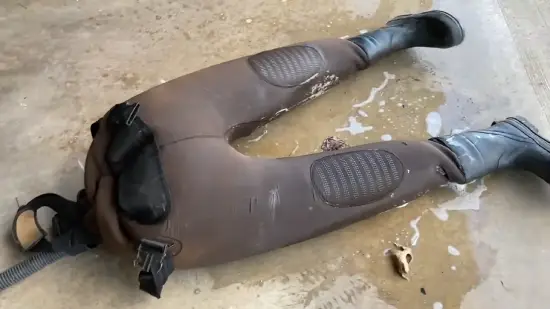
Step 01: Clean and Dry the Waders
After identifying the troublesome areas, it’s time to thoroughly clean your trusty fishing gear and ensure they’re completely dry for optimal repair results.
Use a mild detergent and water to clean the affected areas, removing any dirt, debris, and oils that may interfere with the repair process. Rinse the waders thoroughly and allow them to air dry completely.
This step will help prepare the waders for the next repair stage.
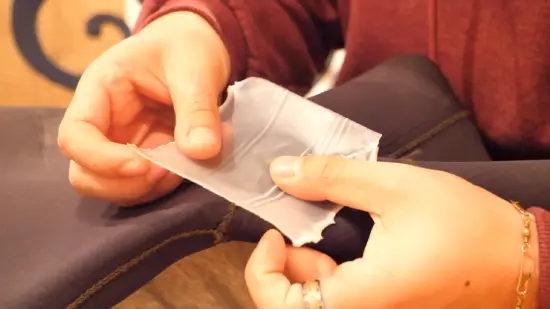
Step 02: Patch Small Holes
Now that you’ve cleaned and dried your waders, it’s time to address those small holes. Like a skilled craftsman patching up a tattered sail, start using a wader repair kit with adhesive patches designed specifically for waders. Cut a patch slightly larger than the hole, round the corners, and cover the damaged area.
Apply a thin layer of repair adhesive onto the patch and press it firmly onto the leak. Smooth out any air bubbles or wrinkles and let it cure according to the instructions provided.
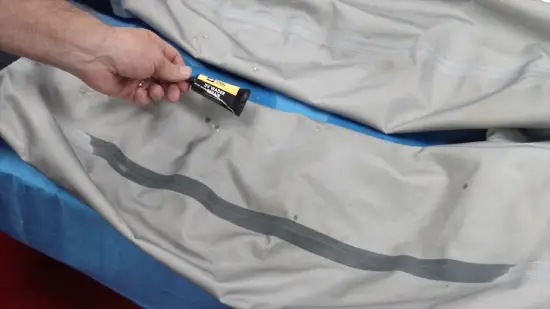
Step 03: Seam Repairs
Revive your trusty gear with a specialized seam sealer, transforming those vulnerable areas into impenetrable fortresses. Use a liquid or tape form sealer, applying a thin and even layer along the seam, extending beyond the leak area.
For tape, carefully apply it over the leaky seam, ensuring full coverage. Follow the manufacturer’s instructions for curing time. Seam repairs are essential to keeping your fishing waders in top condition.
Step 04: Neoprene Cement for Larger Repairs
To ensure maximum durability, apply generous amounts of neoprene cement to both sides of the tear in your waders and firmly press the edges together. Allow the cement to set and dry thoroughly before use. Remember, using neoprene cement for larger repairs can increase the lifespan of your gear by up to 50%.
Step 05: Test the Repairs
After filling the waders with water and inspecting the previously repaired areas, it’s crucial to thoroughly test the repairs’ effectiveness. To do this, follow these steps:
- Move around and flex your legs to check for any signs of water seeping in.
- Sit down and stand up to see if any leaks occur during these movements.
- Bend over and touch your toes to put extra pressure on the repaired areas.
- Finally, walk in shallow water to ensure the repairs hold up under normal fishing conditions.
How Do You Prevent Leaks in Your Fishing Waders?
There are several key points to remember to prevent leaks in your fishing waders:
- Choose High-Quality Waders
- Proper Storage
- Avoid Sharp Objects
- Inspect and Clean Regularly
- Use Seam Sealant or Wader Repair Kits
- Proper Fit and Movement
- Don’t Overinflate Waders
- Consider Using a Wading Belt
i) Choose High-Quality Waders
When looking for fishing waders, it’s important to invest in high-quality brands. Look for reputable brands known for their durable materials and well-constructed seams. These waders are less likely to develop leaks and will last longer.
With high-quality waders, you can have peace of mind knowing that you are protected from water and can focus on your fishing adventure. Invest in waders that will withstand the rigors of the outdoors and provide you with a reliable and comfortable fishing experience.
ii) Proper Storage
Make sure your waders are stored away from direct sunlight in a cool, dry place. This will safeguard them from potential damage caused by extreme temperatures and sunlight exposure.
Storing waders in a cool and dry location helps prevent the material from degrading over time. Avoiding direct sunlight is also crucial because it can accelerate the deterioration process.
iii) Avoid Sharp Objects
Remember, being cautious around sharp objects is essential to prevent damage to your gear and ensure you can continue enjoying your fishing adventures.
Did you know a study found that over 60% of waders get punctured or torn due to contact with sharp edges? To avoid such mishaps, follow these tips:
- Store your fishing waders in a safe place away from sharp objects.
- Be mindful of your surroundings and avoid contact with rocks, thorns, and fishing hooks.
iv) Inspect and Clean Regularly
Regularly inspecting and cleaning your gear is crucial to maintaining its integrity and longevity. Before and after each trip, carefully examine your fishing waders for any signs of wear, tears, or damage. Address any issues promptly to prevent further damage.
Follow the manufacturer’s cleaning instructions to effectively remove dirt and debris, as this will help identify and prevent leaks. By staying proactive, you can extend the lifespan of your fishing waders and enjoy leak-free adventures.
v) Use Seam Sealant or Wader Repair Kits
To prolong the lifespan of your gear, reinforce seams and patch small holes with sealants or repair kits, ensuring leak-free adventures. Here are four steps to effectively use seam sealant or wader repair kits to prevent further big tears and holes in your waders.
- Identify the areas that need repair by inspecting the seams and looking for small holes or weak spots.
- Clean and dry the area thoroughly before applying the sealant or repairing the patch.
- Follow the instructions provided with the sealant or repair kit to ensure proper application.
- Allow sufficient time for the sealant or repair patch to dry completely before reusing your fishing waders.
vi) Proper Fit and Movement
Ensure you have a comfortable and unrestricted range of motion by selecting properly fitting waders that allow you to move freely. Ill-fitting waders can restrict movement and cause discomfort.
When trying on waders, ensure they aren’t too tight or loose. Check for any restrictions in movement, such as bending or squatting. Finding waders that provide a snug fit without limiting your mobility is crucial to ensuring a successful and enjoyable fishing experience.
vii) Don’t Overinflate Waders
Overinflating can lead to excessive stress, making the waders more prone to leaks. To help you prevent this, here are four key tips to keep in mind:
- Adjust straps or suspenders without overinflating the waders.
- Avoid putting unnecessary pressure on the seams.
- Check for any signs of bulging or overinflation.
- Maintain comfortable air pressure without excessive tightness.
viii) Consider Using a Wading Belt
Secure your connection to the water’s edge with a wading belt, creating a watertight embrace between you and the depths below. This simple accessory adds an extra layer of protection against leaks in deeper water.
Cinching the belt snugly around your waist creates a seal between your body and the top of the waders, preventing water from seeping in. Remember to consider the importance of a wading belt for staying dry and comfortable while fishing.
Can I use duct tape to repair leaks in my fishing waders?
Using duct tape to repair leaks in fishing waders may seem like a quick fix, but it isn’t recommended for a long-lasting and reliable solution. Duct tape isn’t specifically designed for wader materials and may not provide a durable repair.
To ensure a proper fix, it’s best to use specialized wader repair kits or adhesive patches that are specifically designed for waders. These options will provide a more reliable and lasting solution to fix leaks in your fishing waders.
Can I repair neoprene waders using regular glue?
To effectively repair your neoprene waders, you’ll need to use neoprene cement, like a surgeon using the perfect stitch to mend a delicate fabric. Here are four reasons why regular glue won’t cut it:
- Neoprene cement is specifically designed to bond neoprene effectively.
- Regular glue may not provide a strong and durable repair for neoprene waders.
- Using regular glue may compromise the longevity of the fix.
- Neoprene cement ensures a reliable and lasting repair, preserving the integrity of your waders.
How often should I inspect my fishing waders for leaks?
Regular inspections of your fishing waders are essential for ensuring their integrity and preventing potential damage. You can detect leaks or damage early on by inspecting your waders regularly. This proactive approach will help prevent leaks from worsening and extend the lifespan of your waders.
Make it a habit to thoroughly inspect your waders before and after each outing to ensure a reliable and enjoyable fishing experience.
Don’t Let Leaks Ruin Your Fishing Fun: Take Care Of Your Waders
Finding and repairing leaks in your fishing waders is essential to ensure a comfortable and effective fishing experience.
Visual inspection techniques, water immersion tests, soap bubble tests, and more can help you pinpoint leak locations. Repairing these leaks with adhesive patches, seam sealers, or neoprene cement, depending on the size and type of damage, will restore the integrity of your waders.
You can minimize the risk of leaks by regularly inspecting your waders and taking preventive measures, such as using sealants and avoiding sharp objects.
However, if you find a leak, it’s important to repair it promptly using suitable methods like patching or sealing. Remember, even a small leak can greatly impact your comfort and safety. So don’t let those leaks dampen your fishing adventures.