
How to Dry Waders: A Complete Step-by-Step Guide
To dry your waders effectively, rinse off salt and contaminants immediately to prevent damage. Then hang them fully extended on wide, sturdy hangers in a shaded, well-ventilated area.
Flip your waders inside out once the outer shell is dry to expose hidden moisture in pockets, seams, and stocking feet. Avoid heat sources and machine dryers that can weaken coatings.
Thorough drying prevents mildew and odors while preserving waterproof performance. Explore additional tips for upkeep and troubleshooting to extend your waders’ lifespan.
Key Takeaways
- Rinse waders thoroughly with fresh water after use to remove salt, dirt, and contaminants before drying.
- Hang waders fully extended on wide, rounded hangers in a shaded, well-ventilated area to maintain shape and airflow.
- Use fans and cross-ventilation to promote steady airflow around seams and boot feet, avoiding direct heat or sunlight.
- After the outer shell dries, flip waders inside out to air dry interior surfaces and check for hidden moisture.
- Never use heat sources like dryers or radiators; air dry completely to prevent mildew, fabric damage, and odor buildup.
Hang Your Waders Immediately for Effective Drying
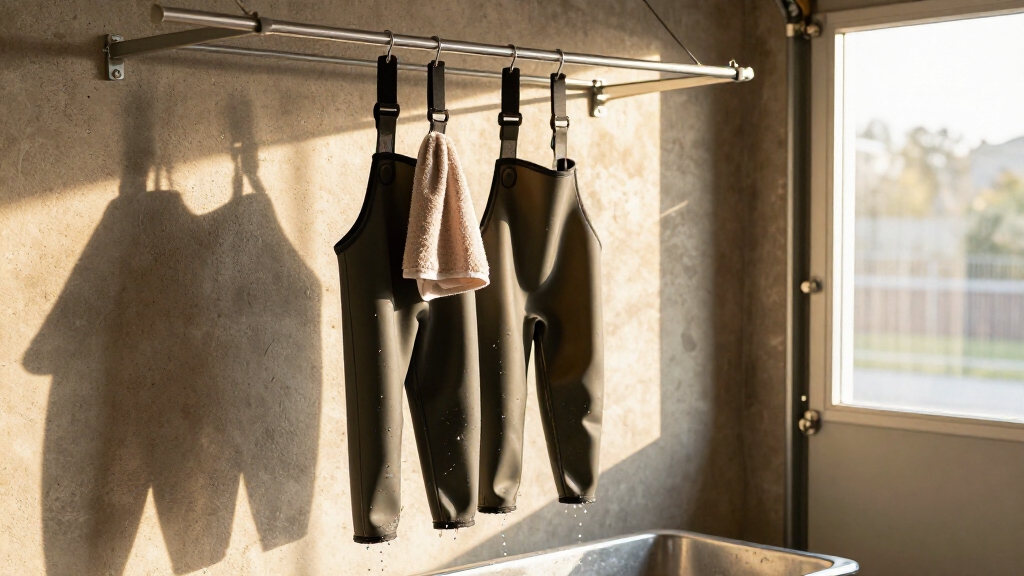
Hanging your waders immediately after use is essential for effective drying and prolonging their lifespan.
You want to let excess water drip off before storage, so hang them in a well-ventilated space that promotes airflow.
Use a wide, rounded hanger or a dedicated wader hanger to maintain their shape and prevent pressure marks or fabric stress.
Avoid wire hangers since they can bend under wet weight and damage the material.
Keep your waders fully extended, not bunched up, so air reaches every surface evenly.
This setup speeds evaporation and reduces trapped moisture, which can cause mildew or weaken fabric over time.
For best results, consider using boot dryers or silica gel packets to speed up moisture removal, especially in humid environments.
Rinse Saltwater Waders Before Drying to Prevent Damage
When you finish your saltwater or brackish-water fishing session, make sure to rinse your waders thoroughly with fresh water before drying them.
Salt residues can crystallize on fabric and seams, accelerating material degradation and compromising waterproof membranes.
Salt crystals form on seams and fabric, speeding up wear and damaging waterproof layers.
Use a gentle spray or soak your waders in a tub to dissolve salt deposits from both the exterior and interior surfaces.
Pay special attention to seams, boot feet, and fabric folds where salt tends to accumulate.
After rinsing, shake off excess water and proceed to hang them for drying.
Skipping this step risks salt buildup that weakens fabric fibers, promotes stiffness, and encourages premature wear.
Proper rinsing extends your waders’ lifespan by preserving material integrity and maintaining waterproof performance over repeated saltwater exposures.
It is important to rinse thoroughly with clean water to ensure all detergent and salt residues are removed before drying.
Dry the Outer Shell of Your Waders Properly
When it comes to drying the outer shell of your waders, it’s best to find a shaded, well-ventilated spot. You see, direct sunlight can really take a toll on the fabric and shorten its lifespan.
Make sure there’s good airflow all around your waders, too. This helps with evaporation and keeps moisture from hanging around, which is super important.
And definitely steer clear of enclosed or humid spaces—those can just slow down the drying process and risk damaging your gear.
Using a sturdy hanger or drying rack can help ensure proper ventilation and maintain the shape of your waders during drying.
Choose Shaded Drying Spot
To dry the outer shell of your waders effectively, set them up in a shaded area that offers consistent airflow. Direct sunlight may accelerate drying but causes UV degradation, weakening fabric integrity and waterproof coatings.
Choose a location protected from rain and direct heat sources to prevent moisture retention or warping. Make certain the spot allows you to fully extend your waders, avoiding folds that trap water and slow evaporation.
Use a wide, rounded hanger to support the structure without stressing seams or fabric. If humidity is high, a shaded, sheltered porch or garage with open windows works well.
This controlled environment preserves material durability while enabling thorough drying, preparing your waders for interior drying without risking damage or mildew growth. Regular inspections during drying help identify early signs of wear and tear to maintain wader longevity.
Ensure Steady Airflow
Maintaining steady airflow around your waders is essential for efficient drying and preserving their waterproof integrity. Hang your waders fully extended on a wide, rounded hanger to avoid fabric stress and maximize exposure.
Position them in a well-ventilated area where air can circulate freely around all surfaces, especially seams and boot feet. In humid environments, use a fan to enhance airflow and accelerate evaporation.
Avoid bunching or folding, as trapped moisture can degrade waterproof coatings and promote mildew. Make certain air reaches both the outer shell and any creases.
Keep the drying area free from obstructions that block air movement. By controlling airflow carefully, you maintain your waders’ performance and durability while reducing drying time markedly.
To preserve waterproofing over time, regularly inspect and maintain seam construction and waterproofing to prevent leaks and fabric damage.
Avoid Direct Sunlight
After ensuring steady airflow around your waders, keep them out of direct sunlight while drying the outer shell.
UV rays degrade fabric strength and waterproof coatings, causing premature wear. Always choose a shaded or covered location with good ventilation.
This reduces heat buildup and prevents material brittleness. Use a fan if humidity is high to hasten drying without exposing waders to damaging light.
Proper storage practices, including avoiding tight folding, help maintain waterproofing & durability over time.
| Aspect | Recommendation |
|---|---|
| Location | Shaded or covered area |
| Airflow | Steady, with fan if needed |
| Sunlight exposure | Avoid direct rays |
| Temperature | Moderate, avoid heat buildup |
| Drying time | Several hours to overnight |
Protecting your waders from sunlight extends their lifespan and maintains waterproof integrity.
Flip Your Waders to Dry the Inside Completely
Once the outer shell is dry, go ahead and flip your waders inside out. This way, you’ll expose all those interior surfaces to fresh air.
Don’t forget to check the pockets, straps, and stocking feet for any lingering moisture. It’s important to catch any damp spots because they can lead to mildew or fabric damage.
After the inside is completely dry, just reverse the waders again. This will let the exterior finish drying if it needs a little more time.
It’s a simple step, but it really helps keep your waders in great shape! Regularly inspecting your waders for early signs of damage during drying can prevent leaks and extend their lifespan.
Importance Of Inside Drying
Because moisture trapped inside your waders can lead to mildew, fabric deterioration, and unpleasant odors, you need to flip them inside out to dry thoroughly.
The interior often retains water in pockets, seams, and stocking feet, making complete drying essential for longevity and hygiene.
Follow these practical steps:
- After the outer shell dries, turn your waders inside out to expose hidden damp areas to airflow.
- Check and open pockets, straps, and stocking feet to release trapped moisture.
- Hang them in a shaded, ventilated spot to prevent UV damage and accelerate evaporation.
- Once fully dry inside, flip the waders back to the original side if the exterior still needs drying.
Complete inside drying preserves waterproof integrity and prevents odor buildup. Using proper cleaning methods, such as vinegar soak, can help maintain your waders’ condition before drying.
Checking All Moisture Spots
When you flip your waders inside out, make sure to thoroughly inspect all potential moisture traps such as pockets, shoulder straps, and stocking feet.
These areas often hold residual water that can cause mildew and degrade materials if left damp.
Run your hands along seams and inside pockets to detect hidden wet spots.
Pay special attention to the boot feet, where water tends to pool.
Use a clean cloth to blot any stubborn moisture.
Make certain shoulder straps aren’t folded or bunched, as trapped dampness can weaken stitching over time.
Lay the waders flat or hang them fully extended in a well-ventilated, shaded area to promote even airflow.
Addressing all moisture zones now prevents long-term damage and ensures the waders dry thoroughly before storage.
Proper drying also helps maintain the minimal water absorption properties of neoprene, preserving buoyancy and durability.
Reversing For Final Drying
After thoroughly inspecting and drying all moisture-prone areas inside your waders, you’ll need to flip them inside out to expose the interior fully.
This step makes sure trapped moisture in pockets, stocking feet, and seams evaporates effectively, preventing mildew and fabric damage.
Follow these practical steps:
- Gently pull the waders inside out, taking care not to stress seams or fabric.
- Hang them in a shaded, well-ventilated area to promote airflow inside.
- Check pockets, shoulder straps, and feet for residual dampness; adjust as needed.
- Once fully dry inside, reverse the waders to the exterior side to finish drying if necessary.
This method guarantees thorough drying, extending your waders’ lifespan and maintaining waterproof integrity.
For best results, reapplying DWR exterior coatings after drying helps maintain water repellency and fabric durability.
Check Pockets, Straps, and Feet for Hidden Moisture
Look closely inside every pocket, strap, and stocking foot to root out hidden moisture that can linger unnoticed. Moisture trapped in these areas can promote mildew and degrade fabric integrity.
Inspect every pocket, strap, and stocking foot carefully to uncover hidden moisture that causes mildew and fabric damage.
Open all pockets fully, turning them inside out if possible, and feel for dampness along seams and corners. Check shoulder and waist straps thoroughly, as folds and stitching often retain water.
Inspect the stocking feet carefully; these are prone to retaining water inside the booties, especially near seams and folds. Use a clean, dry cloth to absorb any detected moisture or gently squeeze to expel trapped water.
Ensuring these hidden sections are dry aids in preventing odors and prolongs the lifespan of your waders. Don’t overlook this step before final air drying or storage.
Use Fans and Airflow to Speed Up Drying
You can really speed up the drying process by using a fan to boost airflow around your waders, especially if you’re in a humid spot. Just set up the fan so it blows air on both the outside and inside. This way, you’re making sure that air gets into the feet, seams, and pockets.
Benefits of Using Fans
Frequently, using fans markedly accelerates the drying process of waders by enhancing airflow around both the exterior and interior surfaces.
This improved ventilation speeds evaporation, reducing drying time substantially compared to passive air-drying alone.
Fans help maintain consistent air movement, preventing moisture buildup in hard-to-reach areas like seams and stocking feet.
Here’s why you should use fans:
- Promote uniform drying by circulating air around all wader parts, including inside pockets and straps.
- Minimize mildew risk by quickly removing trapped moisture before it can settle.
- Enhance drying in humid environments where natural airflow is insufficient.
- Reduce fabric stress by shortening wet exposure, preserving waterproof coatings and seam integrity.
Integrating fans into your drying setup guarantees waders dry thoroughly and retain performance longer.
Optimal Fan Placement
Positioning fans strategically around your waders maximizes airflow and accelerates drying by targeting both exterior and interior surfaces.
Place one fan facing the outside shell at a slight downward angle to push air across the fabric, preventing moisture buildup.
Simultaneously, position another fan near the boot openings or inside legs to direct airflow inward, facilitating evaporation of trapped moisture.
Make certain fans are spaced to avoid creating stagnant zones where dampness lingers. Use adjustable fans so you can fine-tune angles based on wader design and drying progress.
Keep fans at a safe distance of about 12 to 18 inches to prevent fabric stress or damage from strong airflow.
Enhancing Air Circulation
Building on ideal fan placement, enhancing air circulation involves creating a consistent airflow pattern that reaches all wader surfaces, both inside and out.
To do this effectively, you’ll want to:
- Position fans at multiple angles to target both the interior and exterior, preventing stagnant air pockets.
- Use a low-speed setting to maintain steady airflow without disturbing the wader’s fabric structure.
- Make sure waders hang fully extended with open seams and legs to maximize exposure to moving air.
- Combine cross-ventilation by opening windows or doors if indoors, complementing fan-generated airflow.
This approach reduces drying time by promoting uniform evaporation, limiting moisture retention that can cause mildew or fabric degradation.
Consistent, directed airflow is critical for thorough drying without heat damage, preserving the waterproof integrity of your waders.
Avoid Heat and Machine Dryers to Protect Your Waders
Because excessive heat can severely damage your waders’ waterproof coatings and seam tape, you should avoid using standard clothes dryers or direct heat sources for drying.
Excessive heat harms waterproof coatings and seam tape, so avoid clothes dryers and direct heat when drying waders.
The tumbling action and elevated temperatures can degrade seam adhesives, warp rubber boots, and weaken fabric laminates. This ultimately shortens your waders’ lifespan.
Unless the manufacturer explicitly permits low-heat drying, rely on air drying as your default method.
Avoid blow dryers, radiators, or direct sunlight, as localized heat can cause material brittleness and delamination.
Instead, hang your waders in a shaded, well-ventilated area where airflow gently removes moisture without stressing the waterproof construction.
This careful approach preserves the integrity of your waders, ensuring they maintain both flexibility and reliable water resistance over time.
Prevent Mildew and Odors With Proper Moisture Control
Effective moisture control plays a crucial role in preventing mildew and odors in your waders.
You need to make certain every part dries thoroughly to avoid trapped moisture that fosters microbial growth.
Here’s how to maintain proper moisture control:
1. Rinse saltwater or brackish waders with fresh water immediately to remove salt deposits that encourage mildew.
2. Hang waders fully extended in a well-ventilated, shaded area to maximize airflow and speed drying.
3. Turn waders inside out after the exterior dries to expose the interior for complete drying.
Pay special attention to seams and boot feet.
4. Use a fan in humid conditions to reduce moisture retention and accelerate evaporation.
Consistent attention to these steps prevents mildew and unpleasant odors.
This preserves your waders’ integrity and lifespan.
Store Your Waders Safely After They’re Fully Dry
Once your waders are completely dry inside and out, proper storage is key to maintaining their shape, waterproofing, and longevity. Store them in a cool, dry place away from direct sunlight and heat sources to prevent material degradation.
Use a wide, rounded hanger or a dedicated wader hanger to avoid creases and stress points. Avoid folding or compact storage to preserve fabric integrity.
| Storage Aspect | Best Practice |
|---|---|
| Hanging Method | Use wide, rounded or wader-specific hangers |
| Environment | Cool, shaded, well-ventilated area |
| Avoid | Direct sunlight, heat, folding, tight spaces |
Troubleshooting Common Drying Issues With Waders
Although drying waders is straightforward with the right approach, you might encounter common issues such as slow drying times, lingering moisture in hard-to-reach areas, or fabric odors.
To troubleshoot effectively, consider these practical tips:
- Slow Drying: Increase airflow by using a fan. Hang waders fully extended in a shaded, ventilated area to speed evaporation.
- Residual Moisture: Turn waders inside out after the outer shell dries. Check pockets, straps, and stocking feet carefully for trapped water.
- Odor Development: Rinse off salt or dirt before drying. Ensure complete dryness before storage to prevent mildew and fabric degradation.
- Fabric Damage: Avoid heat sources like dryers or blow dryers unless the label permits. Heat can weaken waterproof coatings and seams.
Following these steps helps maintain wader integrity and prolongs their lifespan.
Frequently Asked Questions
Can I Use Wader-Specific Waterproof Sprays After Drying?
Yes, you can use wader-specific waterproof sprays after drying, but make sure your waders are completely dry first to guarantee proper adhesion.
Follow the product instructions carefully, applying the spray evenly to the exterior surface in a well-ventilated area. Avoid oversaturating seams or fabric.
Regular application helps maintain water repellency and extends the life of your waders. Always test on a small area to confirm compatibility with your wader material.
How Often Should I Clean My Waders to Maintain Waterproofing?
You’ll want to give your waders a gentle refresh after every few adventures, especially if you’ve been in saltwater or muddy conditions.
Frequent cleaning, ideally every 4-6 outings, helps maintain the delicate balance of waterproof coatings and seam integrity.
Use mild soap and cold water, avoid harsh detergents, and always follow with a thorough rinse.
This routine keeps your gear in top shape, prolonging its life and preserving its protective qualities.
What Is the Best Way to Repair Small Tears in Waders?
To repair small tears in your waders, start by cleaning and drying the damaged area thoroughly.
Use a specialized wader repair patch or waterproof adhesive designed for neoprene or breathable fabrics.
Cut the patch slightly larger than the tear, apply adhesive if needed, and press firmly to ensure no air bubbles.
Let it cure for at least 24 hours before use.
Avoid using generic tapes, as they won’t maintain waterproof integrity or flexibility.
Are Neoprene Waders Dried Differently Than Breathable Fabric Waders?
Yes, neoprene waders require a different drying approach than breathable fabric waders.
You should dry neoprene waders flat or hung in a way that avoids stretching. Heat and direct sunlight can degrade the material.
For breathable fabric waders, hang them fully extended in a shaded, ventilated area to speed evaporation without damaging waterproof membranes.
Always avoid heat sources for both types to preserve durability and waterproofing.
Can Storing Waders Rolled Instead of Hung Cause Damage?
Yes, storing waders rolled instead of hung can cause damage.
Rolling traps moisture, creates creases, and stresses fabric fibers.
Hanging keeps waders fully extended, promotes airflow, and prevents pressure marks.
When you roll, you risk mildew buildup, weakened waterproofing, and fabric deterioration over time.
To maintain their shape and durability, always hang your waders on wide, rounded hangers in a well-ventilated space before storage.
Keep Your Fishing Waders Fresh, Dry, and Odor-Free
Properly drying your waders is vital. Seventy percent of wader damage results from trapped moisture causing mildew and material breakdown.
By hanging them immediately, rinsing saltwater, and drying both inside and out, you markedly extend their lifespan.
Avoid heat sources, and don’t forget to check pockets and straps for hidden moisture.
Following these detailed steps guarantees your waders stay functional and odor-free. This saves you costly replacements and maintains peak performance on every fishing trip.