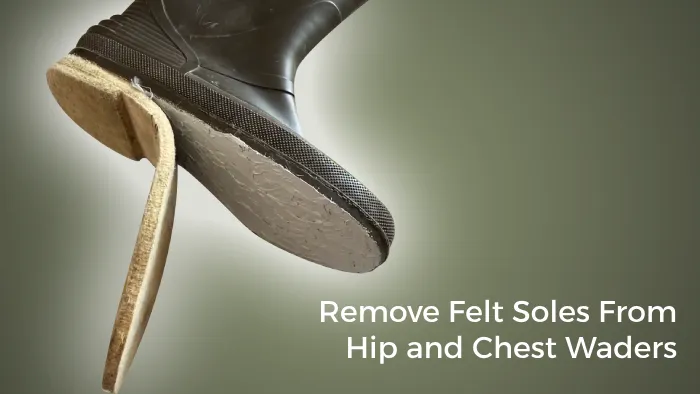
How to Remove Felt Soles from Hip and Chest Waders: A Guide for Fishermen
Fishing waders equipped with felt soles have long been favored by anglers for their superior traction in slippery aquatic environments. But, as environmental concerns have heightened regarding the spread of invasive species, the use of felt-soled waders is being reassessed in various regions.
In response to this, you as an angler often find needing to remove these felt soles from their hip and chest waders.
Start by cleaning your waders thoroughly and let them dry. Then, score the edges of the soles with a utility knife to loosen the adhesive. Next, soften the adhesive by applying heat from a heat gun or hair dryer. To finish, use pliers to peel the soles off.
We’ll take you step-by-step through the process of removing those pesky felt soles. So, read on if you’re skeptical about the process or unsure if it’s worth the effort.
Steps on How Do You Remove Felt Soles from Fishing Hip and Chest Waders
To remove felt soles from your fishing hip and chest waders, you’ll need to follow some key steps. Without further ado, here’s what you need to do:
- Step 01: Tools and materials you’ll need
- Step 02: Clean the waders
- Step 03: Score the edges
- Step 04: Soften the adhesive
- Step 05: Peel the soles
- Step 06: Remove residue
- Step 07: Clean the area
- Step 08: Sand the surface
- Step 09: Inspect and dry
Let’s discuss each step in more detail.
Step 01: Tools and Materials You’ll Need
- Gather the tools and materials you’ll need to remove the waders’ felt soles.
- Start by grabbing a utility knife, which will be useful for cutting through the adhesive holding the soles in place.
- You’ll also need rubbing alcohol or acetone to help dissolve the adhesive and make the removal process easier.
- An old rag or cloth will be useful for wiping away any residue or excess adhesive.
- A scraper or putty knife can gently pry the soles off once the adhesive has been loosened.
- To smooth out any rough edges, have some sandpaper with a medium grit on hand.
- Hot water is optional but can help soften the adhesive for easier removal.
Now that you have everything you need, let’s move on to the next step.
Step 02: Clean the Waders
Once you have gathered all the necessary tools and materials, it’s time to clean the surface of your waders. Start by removing any dirt, debris, or algae from the felt soles and the wader material. This will ensure a clean surface to work with and prevent any potential damage.
Here are some steps to follow:
- Use a soft brush or sponge to gently scrub the felt soles and the wader surface.
- Make sure to remove any visible dirt or grime.
- If there are any stubborn stains, you can use a mild detergent or soap to help loosen them.
- Rinse the waders thoroughly with clean water and allow them to air dry before moving on to the next step.
Step 03: Score the Edges
Here’s a helpful table to guide you through the process:
| Step | Instructions |
| 1 | Lay the waders on a flat surface with the felt sole facing up. |
| 2 | Hold the utility knife or box cutter at a slight angle and gently score along the edges of the felt sole. |
| 3 | Apply enough pressure to cut through the adhesive without damaging the wader material. |
Step 04: Soften the Adhesive
Here are four simple steps to help you soften the adhesive:
- Fill a basin or sink with hot water and submerge the waders, allowing the adhesive to soften for about 15-20 minutes. This will help loosen the glue and make it easier to remove the felt soles.
- Alternatively, you can use rubbing alcohol or acetone. Soak a cloth or rag in the chosen solvent and place it on the adhesive. Let it sit for a while to soften the glue.
- Once the adhesive has softened, gently peel back the felt soles from the waders. Take your time and be careful not to tear the fabric of the waders.
- If any residue remains after removing the felt soles, use a clean cloth soaked in rubbing alcohol or acetone to gently rub away the remaining adhesive. Make sure to thoroughly clean and dry the waders before reapplying new soles.
Step 05: Peel the Soles
Now that you have softened the adhesive, it’s time to peel the soles off your fishing hip and chest waders. This is a delicate process, so it’s important to be patient and gentle to avoid tearing the wader material.
Start by finding a corner of the felt sole and begin slowly peeling it off using your fingers. Take your time and work methodically, ensuring that you’re not putting too much pressure on the wader material.
If you encounter any resistance, you can carefully use a scraper or putty knife to help lift the sole. Remember to continue working slowly and cautiously to ensure the best results.
Step 06: Remove Residue
After peeling off the soles, gently scrape off any remaining adhesive residue from your waders using a scraper, putty knife, or fingernails. Be cautious while doing this, as you don’t want to damage the wader material.
Start by using a scraper or putty knife to carefully scrape off the adhesive. Make sure to apply gentle pressure and avoid using excessive force. If the residue is stubborn, you can also use your fingernails to gently scrape it off.
Take your time and patience, as removing the residue may require effort. Once you have successfully removed all the adhesive, your fishing waders will be ready for your next adventure on the water.
Step 07: Clean the Area
Following the removal of all adhesive residue, thoroughly clean the surface of the waders using rubbing alcohol or acetone to ensure a clean area. This step is crucial in preparing the wader surface for any future use or repairs. Here’s how to clean the area effectively:
- Soak a clean cloth in rubbing alcohol or acetone.
- Gently wipe down the entire surface of the waders, focusing on the areas where the felt soles were attached.
- Ensure that you cover all the adhesive remnants and any remaining dirt or grime.
- Use a circular motion to scrub the surface, applying moderate pressure.
- Pay extra attention to any stubborn residue, removing it completely.
Once you have finished cleaning, allow the waders to air dry completely before proceeding with any further steps.
Step 08: Sand the Surface
To prepare the surface for new attachments, lightly sand the felt sole attachment points using medium-grit sandpaper. This step is crucial to ensure a smooth and clean surface for the new soles to adhere properly.
Start by gently sanding the areas where the old soles were once attached. The medium-grit sandpaper will help remove any remaining residue and rough patches, providing a clean canvas for the replacements. Be sure to sand evenly and with moderate pressure, but avoid excessive sanding that could damage the waders.
Once you have finished sanding, take a moment to inspect the surface for any missed spots or rough areas. Sand those as well until the entire surface feels smooth to the touch. This preparation will help ensure a secure and long-lasting attachment for your new soles.
Step 09: Inspect and Dry
Inspect the waders thoroughly to remove all adhesive and residue before allowing them to air dry completely. This step is crucial to ensure that the waders are in optimal condition for future use. Here is a step-by-step guide to inspecting and drying your fishing waders:
- Check for any remaining adhesive or residue: Carefully examine the waders, paying close attention to the felt sole areas. Use a flashlight if needed to ensure that no adhesive or residue is left behind.
- Remove any remaining debris: Gently brush off any dirt, dust, or small particles that may have accumulated on the waders during removal. A soft-bristle brush or cloth can be used for this task.
- Allow the waders to air dry: Hang the waders in a well-ventilated area, away from direct sunlight or heat sources. This will ensure that they dry thoroughly and prevent any potential damage.
- Double-check for any missed spots: After the waders have dried completely, inspect them again to ensure no adhesive or residue is present. Run your hands over the surface to feel for any rough or sticky areas.
When You Need to Remove Felt Soles from Your Fishing Waders?
If your felt soles are worn out or damaged, it’s crucial to replace them to ensure your safety while wading. Worn-out soles can greatly reduce traction, putting you at a higher risk of slipping and getting injured while navigating through slippery riverbeds or streambanks.
Also, damaged soles can leak water, making your fishing experience uncomfortable and potentially dangerous. Inspecting your felt soles regularly for signs of wear and tear, such as fraying, thinning, or separation from the wader material is important.
If you notice any of these issues, it’s time to remove the felt soles and replace them with new ones. By taking this proactive step, you protect yourself and help prevent the spread of invasive species, ensuring the health and preservation of aquatic ecosystems.
How many years do fishing wader’s felt soles last?
On average, fishing wader felt soles can last for more than three years with proper care and moderate wear. Here are some tips to help you get the most out of your felt soles:
- Clean them after each use: Rinse off any dirt, sand, or debris from the soles to prevent them from wearing down prematurely.
- Allow them to dry properly: After cleaning, let the felt soles air dry completely before storing them. This helps prevent the growth of mold or mildew.
- Store them properly: Avoid folding or bending the soles when storing them. Instead, lay them flat or hang them in a cool, dry place.
- Rotate your waders: Rotate multiple pairs of waders regularly to give the felt soles a chance to rest and recover.
- Avoid excessive wear: While felt soles are durable, try to avoid walking on abrasive surfaces like rocks or gravel for prolonged periods.
Are felt soles good for wading?
Felt soles are highly recommended for wading due to their exceptional grip on slippery surfaces like rocks and mossy logs. When navigating through rivers and lakes, having the right footwear is crucial. Felt soles give anglers the confidence and stability they need to tackle various terrains.
The felt material creates friction, allowing you to maintain your balance and avoid slipping on wet rocks or slimy surfaces. It also offers a reliable grip on mossy logs, which can be particularly treacherous.
Make Fishing Waders Safe and Sustainable by Getting Rid of Felt Soles
As we know, removing felt soles from your fishing waders is necessary to ensure the safety and longevity of your gear. By following the steps outlined in this article, you can easily remove the felt soles without any hassle.
In order to continue their quest for adventure and the perfect catch, anglers must be able to remove felt soles carefully, whether they are transitioning to new soles, complying with new regulations, or simply refurbishing beloved waders. This skill helps anglers respect aquatic ecosystems while respecting the delicate balance of their surroundings.
Remember, prevention is better than cure, so replace your felt soles every couple of years to avoid accidents while wading. Don’t let the grass grow under your feet, take action and keep your fishing adventures safe and enjoyable.