Can You Glue Wading Boots: Go Fishing With 8 Repair Steps
Your fishing wading boots are your trusted companions on your angling adventures, braving rugged terrains and swiftly flowing waters.
But, day-to-day wear and tear can damage them, leading to detached soles, separated midsoles, and other damages. In this situation, you may wonder, “Can you glue wading boots?”
You can use glue to extend the life of your fishing wading boots. Gluing your wading boots can be a practical and cost-effective way to do so.
For successful repairs, you may use a variety of adhesives. These adhesives include contact cement, shoe repair glues, and marine-grade epoxy resins.
We’ll discuss the types of glues available and the process of gluing fishing wading boots.
Can You Glue Wading Boots: Expert and User Recommendations on Suitable Glue Types

There are several types of adhesive products recommended by experienced anglers and users on fishing forums that can help you achieve successful repairs. These are:
Barge Cement
Barge Cement is considered a highly reliable adhesive for repairing wading boots. It’s effective for bonding different materials used in waders and boots, including felt and rubber soles. Many users have reported success in using Barge Cement to reattach soles and other components.
Aquaseal
Aquaseal is another popular choice for repairing fishing wading boots. It’s known for its waterproof properties, making it an ideal option for water-related gear repairs. Several users have recommended Aquaseal for fixing damages and leaks in waders and boots.
Gorilla Glue
Gorilla Glue has been used for various repairs on fishing wading boots. Original Gorilla Glue, which expands as it cures, has been mentioned for attaching or repairing various parts of the boots. Users have succeeded in using Gorilla Glue to reattach soles and other components.
Goop
Goop adhesive has been recommended by some users for repairing wading boots. It’s noted as effective for temporary fixes to get through the season. However, some users have cautioned against using Gorilla Glue due to its messiness.
Shoe Goo
Shoe Goo is a popular adhesive that has worked for gluing felt to walking boots. Users have reported using Shoe Goo for repairing wading boots and other footwear. It’s advised for its flexibility and durability in bonding materials.
Marine-Grade Epoxies
Various marine-grade epoxies have been recommended for repairing wading boots. These epoxies are mentioned as effective for sole repairs and other structural fixes. Users have pointed out their compatibility with water and harsh conditions.
MS Polymer Adhesive and Sealant
Using MS Polymer adhesive and sealant for repairing footwear is a popular choice due to its strong bonding capabilities and resistance to water. When fixing your wading boots, this adhesive is a reliable option that can withstand the toughest conditions.
Evo-Stik 528 Contact Adhesive
For a reliable repair option, try Evo-Stik 528 Contact Adhesive. It’s flexible and waterproof, specifically designed to bond rubber, leather, and neoprene. This makes it a great choice for repairing wading boots.
Sikaflex
Sikaflex has proven to be effective in repairing footwear, providing strong and long-lasting bonds. Regarding gluing wading boots, Sikaflex is a top choice for many outdoor enthusiasts.
3M Marine Adhesive Sealant 5200
The 3M Marine Adhesive Sealant 5200 is a popular choice for repairing wading boots due to its durability and compatibility with outdoor and marine environments.
This adhesive sealant is specifically designed to withstand the harsh conditions that wading boots often encounter, such as exposure to water, mud, and rocks.
It forms a strong bond that can withstand the rigors of outdoor activities, providing long-lasting repairs.
The 3M Marine Adhesive Sealant 5200 is also resistant to saltwater, making it an excellent choice for those who frequently fish in saltwater environments.
How to Fix Fishing Wading Boots Using Glue: Steps to Follow
If you are going to fix fishing wading boots using glue, there are a few key steps that you need to follow. They are as follows:
- Step 1: Assess the damage
- Step 2: Gather materials
- Step 3: Clean and dry the boots
- Step 4: Apply the adhesive
- Step 5: Wait for tackiness
- Step 6: Align and press surfaces
- Step 7: Clamp or hold surfaces
- Step 8: Allow to cure
Let’s take a look at each step in detail.
Step 1: Assess the Damage
You need to closely examine your fishing wading boots to assess any damage. This step is crucial before attempting any repairs.
By carefully examining your boots, you can identify the areas that need fixing and determine the best course of action. Here are a few things to consider:
Detached Soles: Check if the soles of your boots are coming off or have completely detached. This can be a common issue after extended use.
Separated Midsoles: Look for any separation between the midsole and the upper part of the boot. This can lead to instability and discomfort while wading.
Torn Sections: Inspect the boots for any tears or holes in the material. These can compromise the waterproofing and overall durability of the boots.
Step 2: Gather Materials
Following the inspection, you need to gather all the necessary materials for the repair. Start by finding a suitable adhesive that is designed for bonding rubber or neoprene materials. Look for a product specifically labeled for waterproof repairs.
Next, gather cleaning materials such as acetone, rubbing alcohol, and a cloth. These will help ensure that the surfaces are clean and free of any dirt or oils that could interfere with the adhesive bond.
Step 3: Clean and Dry the Boots
Make sure to properly clean the surfaces of your boots using acetone or rubbing alcohol before moving on to the next step. This is crucial to ensure a strong bond when gluing your wading boots. Here are some key points to keep in mind when cleaning and drying your boots:
- Use a clean cloth or paper towel to apply the acetone or rubbing alcohol to the surfaces of your boots. Make sure to cover all areas that will be bonded.
- Gently rub the cloth or towel on the surfaces to remove any dirt, debris, or old adhesive residues. Be thorough in your cleaning to ensure a clean and smooth surface.
- Allow the boots to air dry completely before proceeding. This may take some time, depending on the environment and conditions. Avoid using heat sources to speed up the drying process, as this can damage the boots.
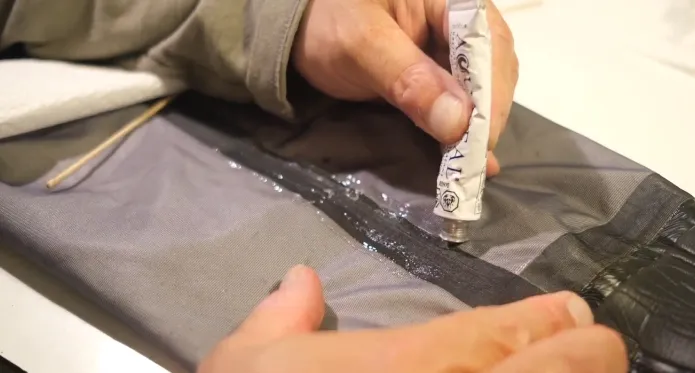
Step 4: Apply the Adhesive
Now, apply the appropriate adhesive according to the type of repair needed:
For Detached Soles
Apply the adhesive to both the sole of the boot and the sole bed where the sole will be attached.
Use a brush, spatula, or applicator provided with the adhesive to spread it evenly. Aim for complete coverage without excess.
If using contact cement, apply a thin, even coat to both surfaces. Follow the application instructions for any other adhesive you plan to use.
For Separated Midsoles or Other Repairs
Apply the adhesive to both surfaces that need to be bonded. Use a brush or applicator to ensure even coverage.
Follow the adhesive’s recommended application method, whether it’s brushing, spreading, or other techniques.
While it’s important to ensure complete coverage, avoid applying excessive adhesive that could squeeze out when pressure is applied. Excess adhesive can be messy and difficult to clean up.
Step 5: Wait for Tackiness
Depending on the adhesive, you may need to wait for it to become tacky before proceeding with the bonding process. Once the adhesive reaches the appropriate tackiness level, bond the wading boots together.
This is an important step in ensuring a strong and durable bond between the separated midsoles or other areas that need repair. Waiting for the adhesive to become tacky allows it to reach its optimal bonding properties, ensuring a secure and long-lasting fix. Here are a few tips to help you enjoy this process:
- Be patient and follow the adhesive’s instructions for the appropriate tackiness level.
- Use a timer or follow the recommended waiting time to ensure the adhesive has enough time to reach the desired tackiness.
- Avoid touching the adhesive during this waiting period to prevent interfering with its bonding properties.
Step 6: Align and Press Surfaces
Now that the adhesive on your wading boots is tacky, it’s time to move on to the next step: aligning and pressing the surfaces together.
Carefully press them together to ensure proper alignment. Pay special attention to getting a precise fit, especially for detached soles.
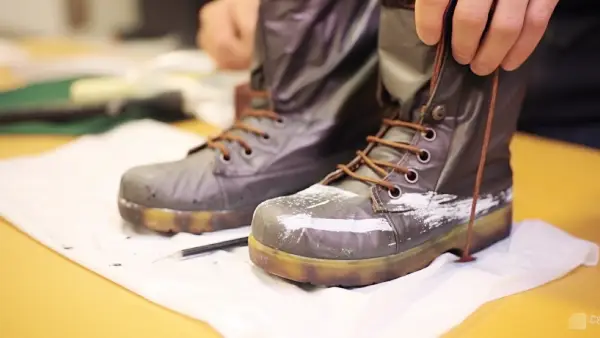
Step 7: Clamp or Hold Surfaces
Follow these steps for applying pressure:
For Detached Soles
Use clamps or a weighted object to apply even pressure to the glued area. This ensures a strong bond between the sole and the boot’s sole bed.
For Other Repairs
Depending on the adhesive, you might need to hold the surfaces together using your hands or clamps. Apply the recommended pressure for the adhesive you’re using.
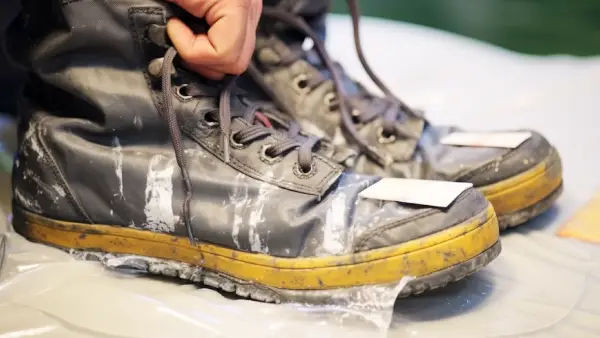
Step 8: Allow to Cure
After bonding the surfaces, allow the adhesive to cure according to the manufacturer’s instructions. Ensure you give the adhesive enough time to cure properly, as this will ensure the best bond for your wading boots.
Check the manufacturer’s instructions for the recommended curing time. Some adhesives may require several hours to dry, while others may need up to 72 hours for full curing.
Ensure that the area where the boots are curing is well-ventilated. This will help any adhesive fumes dissipate and prevent potential health hazards.
Can you use cyanoacrylate for repairing fishing wading boots?
You can use cyanoacrylate, commonly known as super glue, for repairing fishing wading boots.
Cyanoacrylate is a fast-drying adhesive that forms a strong bond on various materials, including rubber, leather, and synthetic fabrics commonly found in wading boots.
But, while cyanoacrylate can be effective for certain repairs, it might not provide the same level of flexibility and durability as adhesives specifically designed for footwear repairs.
You need to carefully assess the type of damage and the materials involved before deciding on the best adhesive for your wading boot repair. Also, ensure proper surface preparation and application techniques for the adhesive to achieve the desired results.
How long do glue-applied repairs last on fishing wading boots?
The durability of glue-applied repairs on fishing wading boots depends on multiple factors, including the adhesive type, the extent of damage, the materials involved, and the quality of the repair.
Using specialized footwear repair adhesives and applying proper techniques can result in repairs lasting for several hundred hours of wear, providing durable and lasting results for your boots.
Keep Your Fishing Wading Boots in Top Shape
Now that you know, it is indeed possible to glue wading boots. Using the right type of glue, such as a strong adhesive specifically designed for outdoor use, you can easily fix any issues with your fishing wading boots.
Just follow the step-by-step instructions on how to fix them using glue, and you’ll be back out on the water in no time.Remember, a well-maintained pair of wading boots is essential for a successful fishing trip, so pay attention to this important piece of gear.
![How to Make Your Own Fishing Waders: 10 Steps [DIY]](https://www.cnybia.com/wp-content/uploads/2023/07/how-to-make-your-own-fishing-waders1-768x432.webp)