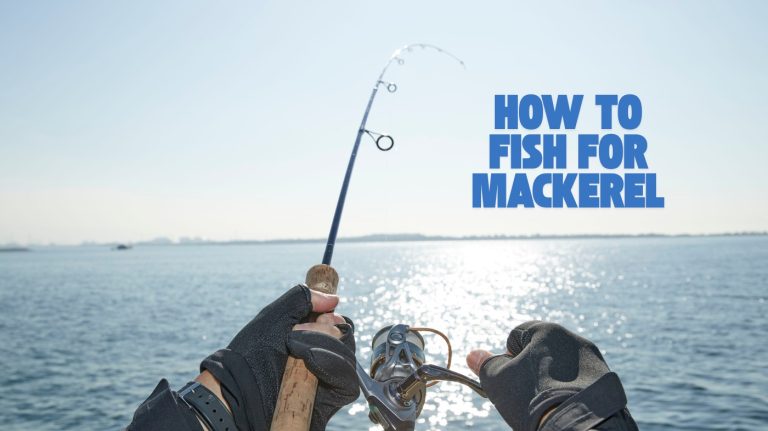
How to Set up a Fishing Line for Beginners: Target Catch
To set up your fishing line, first assemble your rod and securely attach the reel, ensuring the handle matches your handedness. Select a line suited to your target species; monofilament is great for beginners due to its flexibility.
Tie the line to the spool with a secure knot, maintain steady tension to prevent twists, and spool it evenly without overfilling. Then, attach hooks and weights using reliable knots like the Improved Clinch.
Mastering these steps will prepare you for precise casting and effective fishing.
Key Takeaways
- Choose a suitable rod and reel combination based on target species and fishing conditions for ease of use and balance.
- Attach the reel to the rod securely, aligning guides properly and ensuring the handle matches your handedness.
- Spool the line onto the reel using a secure knot, maintaining steady tension to avoid twists and overfilling the spool.
- Learn and practice essential knots like the Improved Clinch and Palomar for attaching hooks, lures, and line connections.
- Attach hooks, weights, and bobbers correctly by moistening knots, positioning weights above the hook, and setting bobber depth precisely.
Choosing the Right Fishing Rod
When choosing the right fishing rod, you need to contemplate the type, action, length, and material to match your target species and fishing conditions. For surface fishing, floater rods with softer action and 10-12ft length reduce hook pull and breakage, ideal for large surface fish.
Retractable rods offer portability, ranging 6-12ft for varied distances. Spod and marker rods, 10-13ft long, suit baiting and lakebed detection with heavier test curves. General use rods around 6-7ft provide versatility across scenarios and can be specialized for various line weights like 4wt or 5wt rods to match fish size and environment.
Rod action influences performance: slow action bends fully for sensitivity; medium action balances casting and control. Fast and extra-fast actions favor heavier lures and quick hook sets. Length affects casting and control—short rods excel in accuracy, while longer rods enhance distance.
Graphite rods combine lightweight strength and sensitivity, optimizing your setup. Additionally, coarse fishing rods often feature interchangeable quiver tips to adapt to different species and conditions, enhancing versatility.
Selecting the Ideal Fishing Reel
Although selecting the right fishing rod sets the foundation, choosing the ideal fishing reel directly impacts your casting efficiency and fish control.
Choosing the right fishing reel is crucial for improving casting accuracy and managing your catch effectively.
For beginners, spincast reels offer a closed-face design with a push-button release, minimizing tangles and simplifying casting. Their limited line capacity suits light freshwater fishing but restricts versatility. The spool is concealed inside the housing with a small line exit hole, which helps prevent line tangles common with other reel types (spool design).
Spinning reels provide an open spool for greater line capacity and heavier lines, featuring smooth adjustable drag and reversible handles for left or right-handed use. They enable longer, more accurate casts but demand careful line management to avoid twists.
Baitcasting reels, while offering precise control and stronger drag systems, require skill to prevent backlash and are generally unsuitable for novices. Prioritize ease of use, appropriate line capacity, and balance to ensure comfort and effective learning during initial fishing experiences.
Understanding Different Fishing Line Types
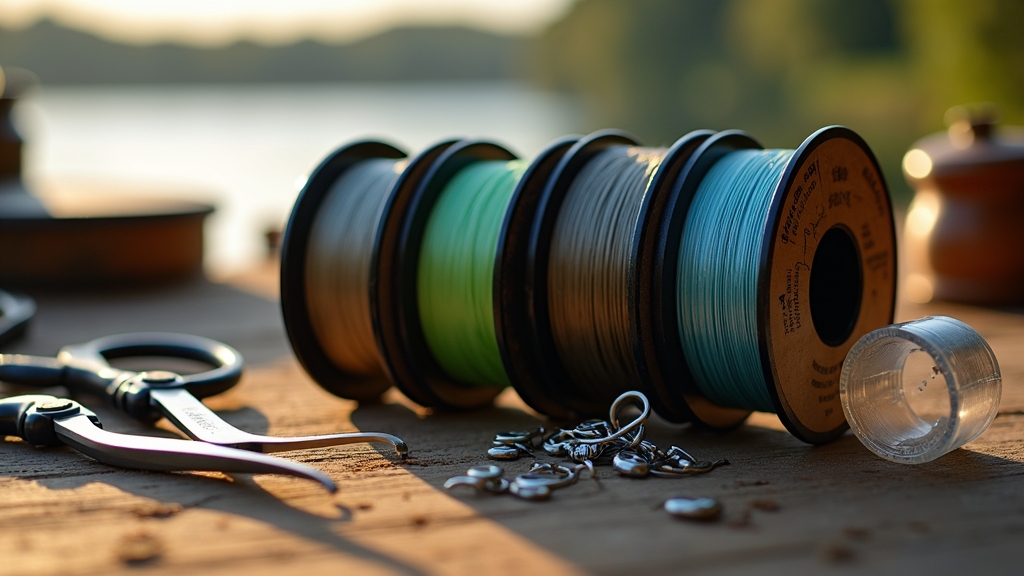
Three primary types of fishing line—monofilament, fluorocarbon, and braided—dominate the market, each offering distinct properties that affect performance and application.
You’ll find monofilament flexible and shock-absorbing, ideal for beginners. Fluorocarbon excels with low visibility underwater and abrasion resistance, perfect for clear water. Its high specific gravity also enables faster sinking of lures and tackle, enhancing fishing effectiveness in deeper or obstacle-rich environments.
Fluorocarbon is commonly used as a leader material to provide strength and stealth where needed. Braided line provides superior strength and sensitivity with minimal stretch but requires a leader due to its visibility.
| Line Type | Key Properties | Best Use |
|---|---|---|
| Monofilament | Stretchy, knot-friendly, floats | General freshwater fishing |
| Fluorocarbon | Low stretch, nearly invisible | Clear water, abrasion-prone areas |
| Braided | High strength, low stretch | Long casts, heavy cover |
Preparing the Rod and Reel for Spooling
Before spooling your fishing line, you need to assemble the rod and securely attach the reel to guarantee smooth operation. Start by connecting rod sections from tip to butt, aligning guide rings precisely by slightly offsetting and twisting each joint.
Begin assembly by joining rod sections tip to butt, aligning guide rings with a gentle twist for precision.
Avoid holding the fragile tip; support the blank midway to prevent damage. Choose a rod length and weight suited for your target fish, generally 1.2 to 2 meters for beginners. Selecting the appropriate line type, such as fluorocarbon lines, can enhance sensitivity and performance.
Attach the reel by sliding its foot into the rod seat and tightening the locking mechanism firmly. Make sure the reel handle matches your handedness. Avoid stressing the guides during installation.
Finally, familiarize yourself with reel parts: open the bail arm for line feeding and set moderate drag tension to protect the line during initial use. Also, line up guide rings before attaching the reel to save time and ensure smooth line threading.
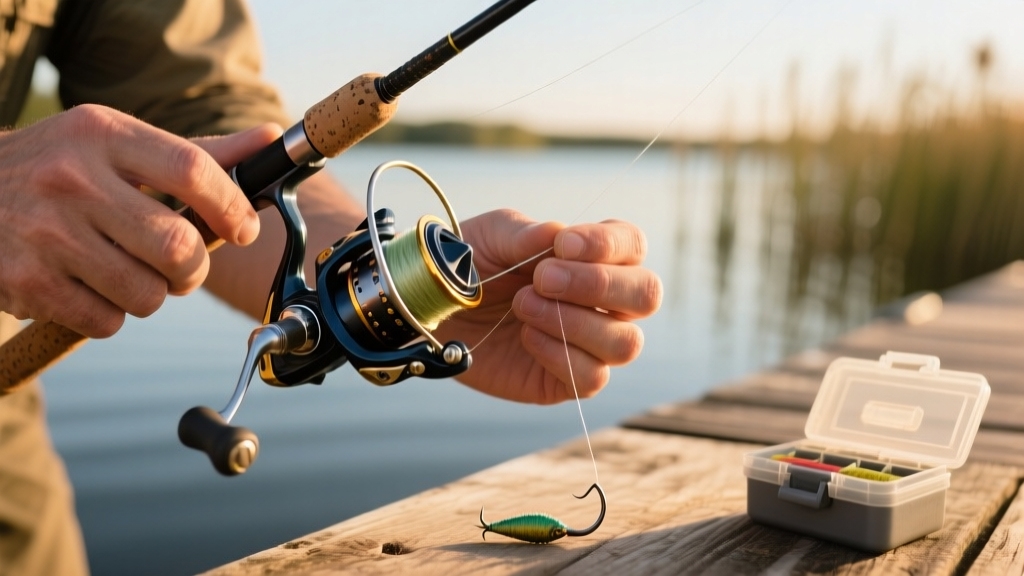
How to Properly Spool Your Fishing Line?
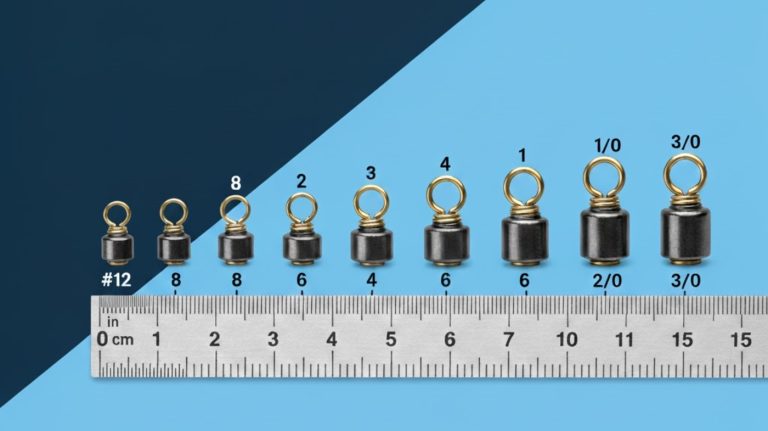
First things first, you want to make sure you attach your fishing line to the reel spool using a solid knot. This is super important because you don’t want it slipping off while you’re out there casting your line. The importance of hooks in angling highlights why secure attachment is critical for a successful catch.
As you start spooling, keep a steady tension on the line. It’s also a good idea to pay attention to the direction the line is going to avoid any annoying twists and tangles. Before you begin, make sure your reel and rod are rated for the correct line weight to ensure compatibility and prevent line-related issues.
When you’re getting close to the finish, aim to fill the spool just about 1/8 inch below the lip. This little tip will help you make the most of your line capacity and boost your overall performance while fishing.
Securing Reel Attachment
Although attaching the fishing line to the reel spool might seem straightforward, securing it properly is crucial to prevent slippage during casting and retrieval.
Start by tying a firm overhand or improved clinch knot on the line end. Wrap the line around the spool, then tie a second knot to form a slip knot that tightens under tension. Position the knot securely so it doesn’t move freely on the spool. Regular maintenance, such as cleaning fishing gear, helps prolong the life of your reel and line.
Ensure knots are tight and neatly seated before spooling. Clip off tag ends to avoid tangling. Place the reel so the line unspools in the reel’s rotational direction.
Keep the reel bail open when starting to spool, then close it to secure the line. Check for line twists or kinks before finalizing attachment. It is important to hold line with tension by using your thumb and index finger near the rod guide while winding to avoid loose line and tangles.
Tension Control Spooling
Securing the line firmly to the reel spool guarantees the stage for effective spooling. Controlling tension during this process ensures the line winds evenly and performs reliably. Maintain consistent tension by running the line lightly between your fingers just before it reaches the spool.
Adjust your reel’s drag to medium-high to add resistance, preventing slack or over-tightening. Avoid excessive tension, which stretches and weakens the line, and insufficient tension that causes loose, uneven winding prone to tangles and backlash.
Use spool holders or line spoolers with adjustable friction for precise control. When spooling braid, consider adding monofilament backing to prevent slippage due to the braid’s slickness and memory.
Periodically stop to check for twists or loops, correcting them immediately. Proper tension minimizes line twist and layering issues, ensuring smooth casting, retrieval, and line longevity. Mastering this balance is essential for optimal fishing line setup, including techniques like the braid to braid knot for secure line connections.
Optimal Line Capacity
How much line should you spool onto your reel for ideal performance? Fill the spool to about 1/8 inch (3mm) below the edge to balance casting distance and reduce friction. Overfilling causes tangles and backlash; underfilling limits casting range and may cause slippage.
Adjust line amount based on the fishing environment. Heavier cover or long casts require fuller spools. Using the correct tippet length can also improve casting efficiency and presentation.
Keep these tips in mind:
Match line capacity to your reel size and line diameter. Check spool etching for recommendations. Maintain consistent tension during spooling to prevent loose wraps and tangles.
Layer line evenly to avoid piling on one side. Trim excess line beyond the spool lip to prevent snags. Use backing when spooling braided lines to improve line grip and prevent slippage. Proper spooling ensures even and snug line lay on the reel, which significantly improves reel performance.
Essential Knots Every Beginner Should Know
To get started with fishing, you’ll want to pick up a few essential knots that can really make a difference when it comes to securing hooks, lures, and connecting lines. Let’s dive into some key ones!
First up, there’s the Improved Clinch knot, which is super popular and effective. Then we’ve the Palomar knot, known for its strength and reliability. And don’t forget about the Uni knot; it’s versatile and works well with different line types!
Each of these knots has its own unique advantages, so it’s good to familiarize yourself with them. Practicing each knot multiple times will help you develop muscle memory and tie them quickly even without looking.
Oh, and here’s a handy tip: always remember to moisten your knots before you tighten them. It helps prevent any friction damage. Lastly, don’t leave those tag ends too long; trimming them closely not only looks neater but also helps maintain the strength of your setup and keeps those pesky snags at bay. Happy fishing!
Knot Types Overview
Although mastering fishing knots can seem intimidating at first, learning a handful of essential knots will equip you to handle most basic rigging tasks efficiently. Focus on these reliable knots designed for strength and compactness, guaranteeing your rig performs under load without slipping.
Each knot offers unique benefits suited to different line thicknesses and conditions.
- Improved Clinch Knot: Ideal for monofilament, ties line to hooks securely.
- Palomar Knot: Strong and simple, excels with braided lines and larger hooks.
- Uni Knot: Versatile for attaching lures, swivels, and line-to-line connections.
- Blood Knot: Joins two lines smoothly, preserving line strength.
- Overhand Knot: Basic foundation knot, often embedded in complex knots.
Mastering these ensures you can rig confidently, maintain line integrity, and avoid common failures. Additionally, these knots facilitate attaching hooks, flies, lures, or swivels to lines or leaders, covering most basic fishing setups.
Knot Tying Tips
Mastering a few key knots sets the foundation, but applying proper techniques guarantees they hold under pressure. Always moisten the line before tightening to reduce friction and prevent damage. The Improved Clinch Knot is commonly learned and easy to tie, making it a great starting point for beginners.
Leave enough tag end for secure wrapping—5 to 7 turns for Improved Clinch—then trim closely with sharp scissors to avoid snagging. Choose knots suitable for your line: Palomar excels with braided, Uni knot suits fluorocarbon and monofilament, while Double Uni is ideal for joining lines and is especially reliable for braid-to-mono connections.
Pull evenly when tightening to form compact knots and ensure smooth sliding to hook eyes. Avoid tying on damaged line and practice regularly off-water to build speed and reliability. Check knots frequently during fishing to confirm tightness, preventing failures and lost fish.
Attaching Hooks, Weights, and Bobbers to the Line
When attaching hooks, weights, and bobbers to your fishing line, selecting the right knots and placements guarantees both strength and sensitivity. Use reliable knots like the Improved Clinch or Uni Knot to secure hooks, leaving a small tag end and wetting the line before tightening.
Position split shot weights 6 to 12 inches above the hook, choosing weight size based on water conditions. Slide the bobber onto the line before tying the hook or use a clip-on bobber, adjusting depth for bait suspension. Always ensure all accessories are securely attached and positioned for optimal fishing.
Secure the bobber to prevent sliding during casts.
- Tie hooks with the Improved Clinch or Uni Knot for strength
- Attach split shot weights gently with pliers above the hook
- Adjust weight size to water current and casting needs
- Use clip-on or sliding bobbers, set depth precisely
- Secure bobbers with stoppers to avoid movement during fishing
Adjusting Your Setup for Target Fish Species
To enhance your fishing setup for the target species, you’ll need to tailor your line type, rod and reel, leader, and terminal tackle to their specific behaviors and habitats. Choose braided line (50-65 lb) for bass in heavy cover to maximize strength and minimize stretch.
Braided line also cuts through vegetation effectively, helping to pull fish from thick cover. Opt for fluorocarbon (15-17 lb) when targeting wary trout or bass in clear water for stealth. Use lighter monofilament for sensitive species like panfish, benefiting from its stretch and knot security.
Match rod power and reel gear ratio to the species’ size and fight; heavy setups for bass or catfish, lighter for trout. Adjust leader length and material based on water clarity and species’ vision; longer fluorocarbon leaders for clear water, shorter for quick-strike fish.
Finally, select weights and floats suited to the habitat and feeding depth for optimal bait presentation.
Practicing Casting Techniques for Better Accuracy
To kick things off, make sure you have a square and balanced stance. This will really help stabilize your body and boost your overall precision. It’s all about finding that sweet spot! Now, let’s talk about line release timing. It’s super important to get it just right—if you release too early or too late, it can really throw off your cast’s accuracy. You don’t want that, right?
Additionally, practicing smooth, fluid motions initiated from the elbow with the wrist and forearm following helps achieve better casting technique and control.
Basic Casting Stance
Although mastering the casting motion is essential, your accuracy begins with establishing a solid basic casting stance. Position your feet about shoulder-width apart for balance and place your lead foot forward (left foot if you’re right-handed) to optimize weight transfer and power.
Observing your surroundings for water and wind awareness before casting helps you adjust your stance and casting angle effectively. Align your body toward the target, keeping a slight staggered stance for longer casts. Maintain relaxed, upright posture with shoulders square to the target and eyes fixed on a precise point.
Key elements of a basic casting stance include:
- Feet shoulder-width apart with lead foot forward
- Weight slightly on the balls of your feet, evenly distributed
- Shoulders aligned with the target
- Elbow close to ribs during backcast
- Steady head and eye focus on a small target
Line Release Timing
When you release the fishing line at the ideal “one o’clock” position during your forward cast, you guarantee the lure follows the best trajectory for accuracy and distance. Timing your release to coincide with the forward rod sweep ensures the lure’s weight pulls the line off smoothly, preventing tangles and miscasts.
Practice thumb releases on a spincast reel or adjust bail opening for spinning reels to develop consistency. Maintain a smooth rod sweep and steady reeling pace post-release to keep line tension, reducing slack that compromises accuracy.
Experiment slightly before and after the one o’clock mark to find your best release point. Use targets during practice to refine muscle memory. Proper line release timing not only improves casting precision but also enhances fish handling by preserving line integrity and steady pressure.
Adjusting the drag so it’s slightly weaker than the line is essential to protect the line from snapping during the fight and helps maintain proper drag setting.
Maintaining Your Fishing Gear for Longevity
To guarantee your fishing gear performs reliably over time, you must commit to regular maintenance that addresses each component’s specific needs. Clean rod guides and reel joints after every use to prevent buildup and corrosion.
Rinse reels with fresh water and lubricate moving parts regularly to maintain smooth operation. Proper maintenance extends reel lifespan and maintains optimal performance. Replace fishing line periodically to avoid weakening and brittleness caused by UV exposure and wear.
Store your gear vertically in cool, dry places with good airflow to prevent damage and material degradation. Wipe rods and reel handles with rubbing alcohol to remove debris. Apply wax to rod ferrules for secure multi-piece assembly.
Inspect reels annually and replace worn parts promptly. Use silica gel packs in storage to control humidity. Check fishing line for frays and replace as needed to prevent breakage and aging.
Frequently Asked Questions
How Do Weather Conditions Affect Fishing Line Choice and Setup?
You need to adjust your fishing line based on weather: wind calls for flexible monofilament to prevent tangles. Cold stiffens monofilament, so braid or fluorocarbon works better. In clear, sunny water, use low-visibility fluorocarbon to avoid spooking fish.
Barometric pressure changes affect fish activity. Lighter lines improve sensitivity before storms, while heavier, abrasion-resistant lines suit post-storm conditions. Always adapt your line strength, type, and length to optimize casting and lure control in varying weather.
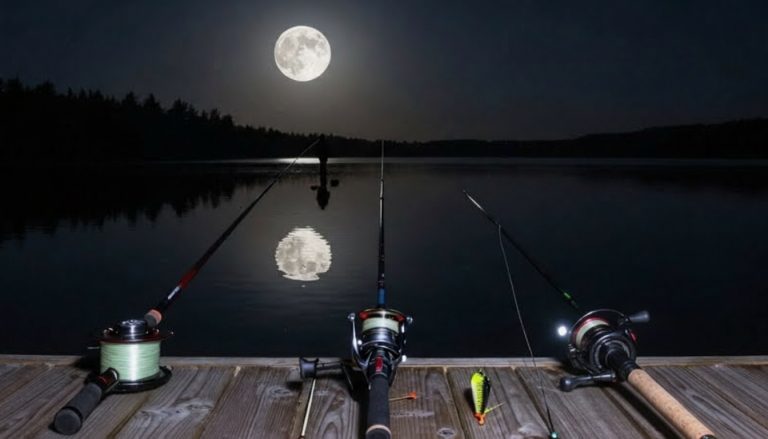
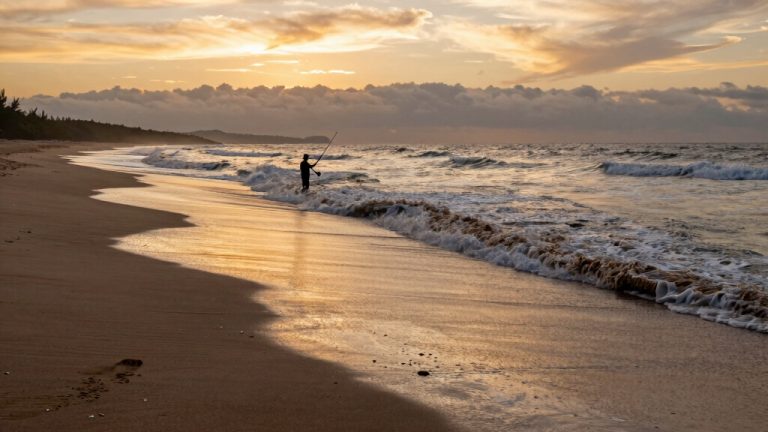
What Are the Best Times of Day for Beginner Fishing Success?
The best times for beginner fishing success are early morning and evening. Fish feed actively during cooler temperatures near sunrise and sunset when light levels and water temperatures favor shallower feeding zones.
Avoid midday heat, especially in summer. In spring and fall, mornings and afternoons work well. Track local conditions and lunar phases to optimize timing. Using apps with solunar and tide data can further improve your catch rates.
Can I Use the Same Fishing Line Setup for Saltwater and Freshwater?
You can use the same fishing line setup for both saltwater and freshwater, but it won’t optimize performance or durability. Saltwater lines require higher abrasion resistance, corrosion-proof materials, and stronger breaking strength to handle tougher fish and conditions.
Freshwater lines focus on sensitivity and finesse. If you switch environments, rinse gear thoroughly to prevent corrosion. For best results, pick lines designed specifically for the water type and species you target.
How Do I Safely Release a Fish After Catching It?
To safely release a fish, wet your hands before handling to protect its mucus layer. Use barbless or circle hooks to minimize injury and remove hooks gently, preferably while the fish is in the water.
Reel fish in steadily to avoid exhaustion and limit air exposure to under 60 seconds. Support the fish’s body when handling, revive it facing upstream by moving it slowly, and release only once it swims away strongly.
What Are Common Mistakes Beginners Make When Setting up Their Fishing Line?
Setting up your fishing line is like weaving a delicate web. Common mistakes can snap it before the catch. You often choose the wrong line strength or type, mismatching hooks and rods, which weakens your setup.
Skipping guides or improper spooling causes friction and tangles, while weak or dry knots invite failure. Neglecting line care, like ignoring abrasions or old lines, makes your gear vulnerable.
Master these to cast smoothly and fish successfully.
Master the Basics for Smooth Casting and Better Results
Setting up your fishing line might seem delicate, like threading a needle in the quiet dawn. Yet it’s the backbone of every successful cast. By choosing the right rod, reel, and line, then spooling and rigging them correctly, you transform complexity into precision.
With practice, your setup becomes as reliable as the tide’s rhythm, ready to meet any challenge. Stay sharp, maintain your gear, and watch your efforts turn into steady, rewarding catches.