Fishing Pole Replacement Tips: Guide for Accuracy and Balance
When replacing fishing pole guides, first inspect for damage and carefully remove old guides using gentle heat and precise tools to avoid blank damage.
Match new guides by type and size, then align them straight with proper spacing, maintaining consistent thread tension while wrapping tightly over smooth guide feet.
Apply high-quality two-part epoxy to seal wraps, rotating the rod steadily for even curing. Follow these steps for durable repairs that restore casting performance.
Explore the detailed process to guarantee professional-quality results.
Key Takeaways
- Inspect and remove old guides carefully using gentle heat and precise tools to avoid blank damage.
- Measure and align new guides accurately following manufacturer spacing charts for optimal line flow.
- Wrap guides tightly with consistent thread tension, locking starts by crossing thread over tag ends without knots.
- Apply two-part epoxy evenly while rotating the rod; remove bubbles and allow full curing before use.
- Use eye protection and minimal heat during guide removal and replacement to protect both yourself and the rod.
Assessing and Preparing for Guide Replacement
Before you begin replacing guides on your fishing pole, carefully assess each guide’s condition to identify any cracks, chips, bent feet, or loose fittings. Visibility and material stiffness can affect guide performance, so consider these factors during evaluation.
Inspect every guide for missing sections and corrosion on metal parts, while checking thread wraps for fraying or wear. Note any loose or missing guides along the rod.
Check guides for missing sections, corrosion, and worn thread wraps, noting any loose or missing guides on the rod.
Next, determine the guide type and size. Identify the manufacturer, measure inner and outer diameters, and record foot length and shape. Compare these with existing guides to guarantee consistency and note special features like roller or snake guides.
Selecting guides with appropriate abrasion resistance can enhance durability in rough fishing conditions. Preparing the rod blank requires removing old guides and thread remnants, lightly sanding attachment areas.
Using gentle heat can soften epoxy to ease the removal of old threads and guides. Confirm the blank is dry and free of damage before proceeding to replacement. This thorough assessment and preparation ensure ideal guide performance.
Essential Tools and Materials Needed
When you’re getting ready to wrap guides on your fishing rod, it’s super important to have the right tools and materials on hand. First up, you’ll want some heavy-duty thread and a reliable bobbin. This combo will help you wrap the guides securely, giving you that smooth finish you’re aiming for.
And don’t forget about the epoxy! Go for a high-quality, quick-setting epoxy that’s specifically made for fishing rods. This will ensure you get strong adhesion and the flexibility you need for a durable bond.
Before applying the epoxy, make sure to clean the damaged area thoroughly with rubbing acetone to improve adhesion. Proper surface preparation is crucial for strong epoxy bonding.
As you start preparing your surfaces for bonding, having precise cutting and sanding tools is key. They’ll help you trim those thread ends cleanly and make sure everything looks neat and professional.
Thread and Bobbin
Although selecting the right thread is critical for a durable and visually appealing fishing pole wrap, equally important is choosing the appropriate bobbin to handle that thread effectively. Proper bobbin tension and thread handling are essential to prevent thread breakage and ensure smooth wrapping.
Your thread choice from nylon, polyester, to Gel Spun Polyethylene affects strength, stretch, and finish. Meanwhile, your bobbin must fit spool size and provide adjustable tension to prevent breakage and maintain smooth wraps.
Understanding the differences between nylon and polyester threads can simplify this selection process. Regular bobbin maintenance ensures consistent performance.
| Thread Type | Bobbin Feature |
|---|---|
| Nylon (pressure-dyed) | Standard metal bobbin |
| Polyester | Adjustable tension bobbin |
| Gel Spun Polyethylene | Precision tension bobbin |
| Metallic/Decorative | Smooth tension, careful feed |
| Kevlar/Monofilament | Specialized tension control |
Epoxy Types Overview
Two-part epoxy resin systems offer quick set times and high transparency, ideal for discreet, flexible bonding in casting, fly, and spinning rods. These epoxies provide excellent durability, which is crucial for maintaining the integrity of your rod under frequent use and varying environmental conditions.
Gel epoxy adhesives, like RodBond or Flex Coat, provide controlled viscosity to prevent dripping during vertical applications and allow extended working time for precise alignment.
For thread wrap protection, finish coat epoxies such as Diamond II create durable, bubble-free surfaces and minimize yellowing when applied with proper brush techniques and rotation. Proper bubble removal is crucial to achieve a smooth, clear finish without imperfections.
When replacing eyelets or components, specialized quick-set epoxies ensure strong adhesion and structural integrity, compatible with carbon fiber rods.
Cutting and Sanding Tools
Selecting the right epoxy sets the foundation, but precise cutting and sanding shape the components for a seamless fit and finish.
Use a hacksaw or a carbon arrow saw to cut rod blanks cleanly. Rotary tools with fine cutting blades excel for detailed trimming and delicate tip work. The choice of tools can affect the rod’s casting performance and distance.
After cutting, remove burrs with fine files and deburring tools to prevent splintering. Smooth surfaces with fine-grit sandpaper or rotary sanding attachments for tight spots. Fine files, sandpaper, and utility knives are necessary tools to ensure a smooth repair process.
Always wear safety glasses, dust masks, and gloves to protect against fiberglass and carbon dust. Measure accurately using rulers and calipers, marking cut lines with pencils and masking tape to ensure accuracy.
Removing the Damaged Guide Safely
First things first, you’ll want to gently heat the epoxy. This will help soften it up, making it easier to work with. Make sure to use a lighter carefully to avoid prolonged contact that might damage the rod blank by loosening the epoxy bond.
Once you’ve done that, grab a sharp razor blade. Carefully cut through those softened layers, but be super mindful not to damage the rod blank. As you peel away the epoxy and thread wrap, take your time. Go slowly and avoid using too much force; after all, you don’t want to risk harming the rod’s finish.
Proper rod maintenance helps prolong equipment lifespan and ensures better fishing experiences. Once you’ve removed everything, give the exposed area a good clean. This will set you up nicely for a smooth guide replacement!
Cutting Epoxy Carefully
Although epoxy removal requires patience, cutting it carefully is essential to preserving the integrity of your rod blank.
Begin by scoring the epoxy and thread down to the guide foot, stopping just short of the blank, using a sharp razor blade. This technique applies effectively to both two-part epoxy and UV cured coating finishes.
Employ a shaving motion rather than a sawing one to avoid gouging. Focus on cutting only the last 1/8 inch near the guide ring to minimize risk. Using lightweight rods, such as those made from carbon fiber, benefits from careful handling to maintain performance.
Work slowly, peeling off loosened epoxy and thread with your thumbnail or a razor blade corner. For stubborn epoxy, gently shave remaining pieces with the back of the blade or use a small hand-held drill bit inside the guide ring.
Avoid cutting into the blank, apply minimal heat if needed, and always wear eye protection during this precise operation.
Cleaning Guide Area
When you apply gentle heat to the guide area, the epoxy and thread soften, making it much easier to remove the damaged guide without harming the rod blank.
Use quick, sweeping motions with a lighter or heat source to prevent overheating. Once softened, locate the thread’s leading edge and carefully lift it with a pick or razor blade corner to unravel the wrap.
Avoid deep cuts by shaving the epoxy and thread residues lightly. Finish by sanding the blank gently to ensure a clean surface for the new guide.
Choosing appropriate replacement guides that complement your fishing style can enhance your rod’s performance, much like selecting sunglasses with the right lens technology.
| Step | Technique |
|---|---|
| Heat Application | Quick, gentle heating |
| Thread Removal | Lift leading edge, unravel |
| Cutting | Shaving cuts, avoid deep cuts |
| Final Cleaning | Light sanding, residue removal |
Proper Positioning and Installation Techniques
Because proper positioning and installation directly affect your rod’s performance and durability, you’ll need to meticulously align the guides and reel seat before securing them.
Start by assembling rod sections from tip to butt, ensuring all guide rings form a straight line to promote smooth line flow and reduce friction.
Assemble rod sections from tip to butt before attaching the reel to facilitate proper guide alignment and prevent damage during setup Rod Assembly & Threading. Choosing reels with appropriate gear ratios can also enhance retrieval efficiency once the rod is properly set up.
Position the reel seat firmly on the blank; no movement should occur to maintain balance and ideal function. Follow manufacturer spacing charts for guide placement, with tighter intervals near the tip and wider toward the handle, adjusting slightly for any blank irregularities.
Orient guides so open ends face the reel or slightly forward, and keep guide feet parallel to the blank axis to prevent twisting. Perform a dry fit, then fine-tune alignment before wrapping to ensure structural integrity and casting precision.
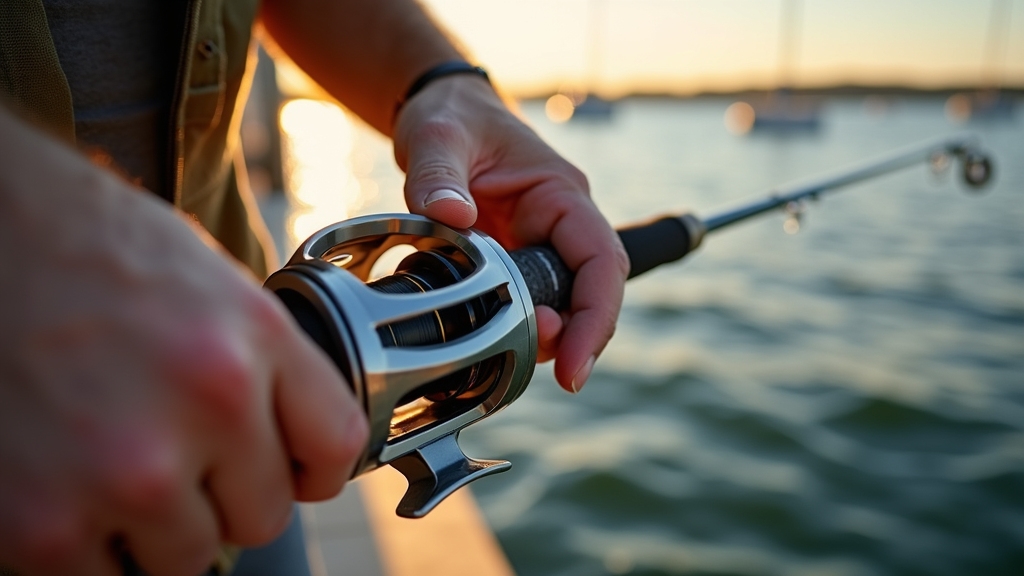
Threading, Wrapping, and Securing the Guide
Securing the guide properly starts with maintaining consistent thread tension during wrapping to guarantee durability and alignment. Use an adjustable tensioning device or hand wrapper, positioning the wand toward you for ideal tension. This technique supports gear preservation by ensuring the guide remains firmly attached during use.
Begin wraps by crossing the thread over the tag end to lock it firmly without knots. Before wrapping, prepare the guide foot by grinding it smooth with a tool like a Dremel grinder to ensure smooth thread transition.
Wrap tightly onto the guide foot after filing it smooth for seamless adhesion. Use finger pressure to avoid slack and employ a burnishing tool post-wrap to compact threads uniformly.
| Step | Action | Purpose |
|---|---|---|
| Initial Wrap | Cross thread over tag end | Secure thread without knots |
| Tension Control | Position tension wand properly | Maintain consistent tension |
| Guide Foot Wrapping | Overlap wraps on guide foot | Prevent guide movement |
| Finish | Burnish wraps | Compact threads, fill gaps |
Applying Epoxy and Ensuring Proper Curing
After you’ve wrapped and secured the guide with consistent tension and neat thread placement, the next step is applying epoxy to protect the wraps and bond the components firmly. Mix equal parts resin and hardener slowly for 3-4 minutes to avoid air bubbles. Pour onto foil to dissipate heat and extend working time.
To minimize bubbles, mix the resin with continuous rotation of the cup using inward motions against the wall and back through the center for about five minutes, allowing any bubbles to float to the surface by turning the syringe upside down bubble control.
Mix resin and hardener slowly for 3-4 minutes to minimize bubbles, then pour onto foil to keep it cool and workable.
Apply epoxy starting at the base of the guide wrap, rotating the rod steadily to spread evenly without overbrushing. Allow partial curing by rotating the rod periodically over 2.5-3 hours to prevent sagging and pooling.
Use a wide brush for larger wraps. Apply epoxy beyond thread edges for sealing. Inspect immediately for bubbles or thin spots. Keep the rod upright initially, rotate 180° as curing progresses. Avoid heat to hasten curing to prevent defects.
Frequently Asked Questions
How Do I Choose the Best Guide Material for Saltwater Fishing?
You should choose guide materials with superior corrosion resistance and heat dissipation for saltwater fishing. Opt for 316-grade stainless steel or titanium frames to withstand saltwater exposure.
For ring inserts, prioritize Silicon Carbide or Fuji Torzite for excellent hardness and thermal management, protecting your line during fights.
Balance weight, sensitivity, and durability based on your target species and fishing style. This ensures your setup performs reliably without unnecessary fatigue or line damage.
Can I Replace Guides on Graphite Rods Without Damaging Them?
Yes, you can replace guides on graphite rods without damaging them if you handle the process carefully.
Apply gentle heat to soften epoxy. Use a fresh razor blade to cut bindings without scraping the blank, and avoid excessive force.
Sand and clean thoroughly before fitting new guides, ensuring smooth thread wraps and even epoxy application. Patience and precise technique prevent cracks or weakening, preserving your rod’s integrity throughout replacement.
What Are Signs That a Rod Guide Needs Replacement Besides Visible Damage?
You’ll notice up to a 30% drop in casting distance when a guide loses smoothness or alignment.
If your line frays near the guide, drags audibly during retrieval, or if the guide wobbles or feels excessively hot after use, those are clear signs it needs replacement.
Even without visible cracks, misalignment, loose wrapping, or corrosion can degrade performance and demand attention before failure occurs.
How Often Should I Inspect and Maintain My Fishing Rod Guides?
You should inspect your fishing rod guides after every trip, especially if you’ve been in saltwater, to remove debris and check for damage.
Perform a deeper cleaning and lubrication about once a month for freshwater use, but weekly if you fish saltwater frequently.
For offshore rods with roller guides, do maintenance at least once per season. Adjust inspection frequency based on environmental exposure to prevent corrosion and guarantee smooth line flow.
Are There Alternatives to Epoxy for Sealing Guide Wrappings?
You’ll find that silane adhesives offer about 70% of epoxy’s water resistance, making them viable alternatives for sealing guide wrappings.
While they cure with moisture and require thin coatings, they won’t provide full waterproofing like specialized rod-building epoxies.
Quick-setting marine-grade adhesives and flexible, clear glues also serve as temporary solutions. However, for long-term durability and strength, epoxy remains the superior choice due to its proven bonding and protective qualities.
Mastering the Wrap: Securing Your Guide the Right Way
Replacing your fishing pole guide might seem tricky, but with the right tools and careful steps, you’ll get it done right. You’ll remove the old guide, position the new one precisely, and wrap it tightly before applying epoxy.
You’ll wait for curing, ensuring durability and performance. By following these exact techniques, you’ll restore your pole’s strength and reliability, turning a repair into a skill you’ll use again and again.